
Analysis Of The New Movistar Router Smart Wifi 6, Revolution In Wifi Speed
We present a complete analysis of the Movistar Router Smart WiFi 6 , the new router that Movistar is beginning to offer to all its fiber customers. The exact name of this model is the Mitrastar GPT-2841GX4X5 , the main difference of this model compared to the previous Movistar HGU (either Mitrastar or Askey) is that it incorporates simultaneous dual band with the Wi-Fi 6 standard. This router can be purchased for all his clients for only €50 if he installs it himself, or €100 if he needs a technician to come and install it at his home, so it is quite cheap if we take into account its technical characteristics. Do you want to know all the secrets about this router, its performance and what configuration options we have available?
Main features
This new Movistar Router Smart WiFi 6 router or also known as Mitrastar GPT-2841GX4X5 is currently being distributed to its new customers, although very slowly compared to other operators that had already had equipment with the Wi-Fi standard for a long time. 6. The improvement of WiFi is the main novelty of this model, in addition to having changes at the firmware level that are quite important and interesting for some customers.
Technical specifications
The technical specifications of this new router are as follows:
- Wireless: Compatible with 802.11a/b/g/n/ac/ax standards. In the 2.4GHz band we will achieve a speed of up to 1,148Mbps thanks to Wi-Fi 6, in the 5GHz band we will achieve a speed of up to 3000Mbps thanks to Wi-Fi 6 and 80MHz channel width.
- CPU & Ethernet: Realtek RTL9607CP with built-in hardware NAT.
- RAM : 256MB of DDR3 RAM, the reference is Micron MT41K128M16JT-125.
- Flash: 256MB capacity, the reference is MX35LF2GE4AD.
- 2.4GHz Wireless Controller: Onsemi QT5GU-AX with the QT6210X transceiver with Wi-Fi 6 4T4R at 1.148Mbps.
- 5GHz Wireless Controller: Onsemi QT5GU-AX with QT7510X transceiver with Wi-Fi 6 5T5R at 3000Mbps.
- GPON : The GPON port works at 2.5Gbps speed, unlike other previous routers which had a maximum speed of 1Gbps. The ONT reference is the Semtech GN25L95.
- Power supply: It needs a current voltage of 12V and an intensity of 2.5A, so it needs a power of 30W.
Once we know the technical specifications with all its components, we are going to see the main wireless, wired, USB and firmware characteristics.
Wireless Features
The main wireless features of this router is that it is simultaneous dual band with Wi-Fi 6 and AX4200 class. In the 2.4GHz band we can achieve a speed of up to 1148Mbps , thanks to its four internal antennas in MU-MIMO 4T4R configuration, a 40MHz channel width and 1024QAM quadrature amplitude modulation that incorporates the Wi-Fi 6 standard for flaw. In the 5GHz band we can achieve a speed of up to 3000Mbps , thanks to its five antennas in MU-MIMO 5T5R configuration, 80MHz channel width and 1024QAM quadrature amplitude modulation of the Wi-Fi 6 standard. This router incorporates support for 160MHz channel width in the 5GHz band, however, it seems that this feature is only available in the download direction (from the router to the client) and not in the upload direction, so in the operating systems we will only see a synchronization speed of up to 1201Mbps as if it had only 80MHz .
One of the novelties regarding the Movistar HGU is that we have a single WiFi network (SSID) in both frequency bands , and we have the band-steering functionality activated. This feature allows clients to connect to a single SSID (WiFi network name) and the router will take care of placing us in the 2.4GHz or 5GHz band. In case you need to connect an IoT device such as IP cameras, Smart TVs or any other device, you may have problems having band-steering enabled and these devices are not compatible with the 5GHz band, but the Movistar firmware It has an option to disable the 5GHz band for 10 minutes to perform this configuration. However, in theadvanced configuration we could disable the band-steering without any problem.
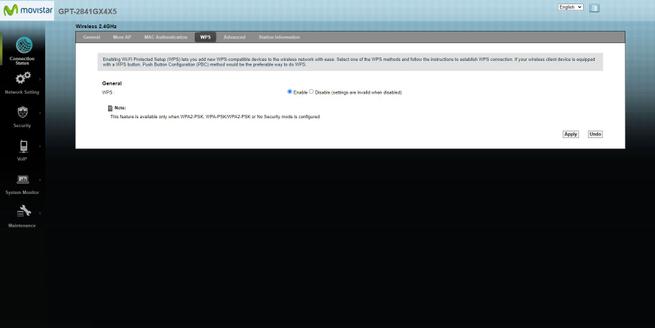
This router incorporates a WPS (Wi-Fi Protected Setup) button that will allow us to synchronize devices over WiFi in an easy and fast way. This equipment comes with the WPA2-PSK security protocol by default, although we can choose the WPA3-SAE encryption method to add additional security to the WiFi wireless network. If you decide to use WPA3, you should know that WPS and band-steering will stop working, in addition, it will warn us that it is absolutely necessary that all wireless clients support this type of encryption, otherwise they will not be able to connect.
Wired
This new router incorporates a GPON port at 2.5Gbps speed , thanks to the Semtech GN25L95 chipset that this equipment incorporates. Therefore, this model is prepared for future speeds of up to 2.5Gbps speed, something very important because most of the GPON routers we had up to now only support 1Gbps maximum since they internally have a Gigabit SFP interface. In future speed increases, it is very possible that they will launch 10Gbps modalities using XGSPON, however, they could also launch speeds of 2.5Gbps download and 1.25Gbps upload using the current GPON and make the most of the fiber.
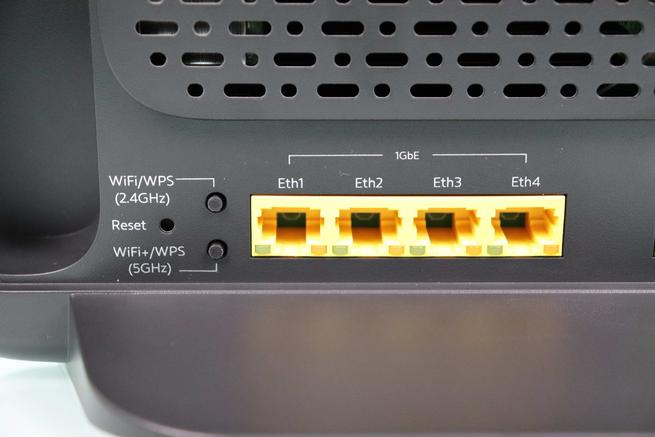
This model incorporates a total of four Gigabit Ethernet ports for the LAN , an important aspect that we must criticize is that the RJ-45 connector tab will be downwards, and the space between the base of the router and the tab is very small, therefore what is possible that your finger does not fit to be able to extract the Ethernet network cable, and you have to use some additional accessories for it, such as a blunt knife or similar. If there was a couple more inches of clearance, this wouldn’t have happened, or if they had mounted the Ethernet ports exactly backwards.
This model also has an RJ-11 port to connect the analog phone, or to connect the router directly to the home phone jack to distribute the signal to all the jacks in the house without problems.
Firmware
The firmware of this new Mitrastar GPT-2841GX4X5 has the same basic menu as always, where we can basically configure the WiFi network of the two frequency bands, the guest WiFi network, open the ports, see the status of the local network as well as clients connected by WiFi and cable. We can also see and configure the IPv6 protocol, go to the firewall configuration directly, enable UPnP which is disabled by default, change the router administration access password and other settings.
In the advanced configuration menu we can make any configuration on the equipment, for example, we could configure the WPA3-SAE protocol in the two frequency bands, we can also disable the band-steering that is activated by default, change all the WiFi configuration including secondary SSIDs for guest WiFi networks. In this advanced menu we can also configure Static DHCP, open ports, open the router’s DMZ, configure dynamic DNS and many other common settings.
In the firmware section of this review you can see in detail all the configuration options available, both with the basic and advanced firmware.
If you want to know what this new router is like in our video, here are all the details in our unboxing and first impressions:
Now that we know what the main technical characteristics of this router are like, we are going to go to the external analysis to see what the box and the new Movistar equipment itself are like.
Read More
External analysis
This new Movistar Router Smart WiFi 6 router comes in a brown box, on the front of the box we can see that it is the new Movistar Smart WiFi 6 Router . On the right side of the box, it will indicate that we will extend the limits of our connection with the new Wi-Fi 6 standard that the router incorporates. On the left side of the box we will have a summary of the contents of the equipment, basically it includes the router, the power supply, Ethernet network cable, installation guide, warranty card and a guide to WiFi tips to improve coverage in our home . Finally, on the back we will find the certifications that it has passed, and also that this equipment is prepared for connection to the Movistar fiber network.

Inside the box we can see a small reminder that tells us that the WiFi network name and password of this router is different from the Movistar HGU you have at home, so you must configure all your devices again with the new name and key we have in the team. You will find this information on the sticker that we have on the back of the router. However, we could also change the SSID and password of this router and make it exactly the same as those of the Movistar HGU, most wireless clients will connect without problems, so as not to have to reconnect all of them.
Inside the box we can see all the documentation incorporated inside the box, and now we will talk about it.

The content of the Movistar Router Smart WiFi 6 box is as follows:
- Movistar Router Smart WiFi 6 Router.
- Current transformer with 12V and 2.5A to correctly feed the equipment.
- Flat Cat5e Ethernet network cable, we have four pairs of wires.
- Quick installation guide.
- Tips guide to improve WiFi.
- Router warranty.
Something that has caught our attention is that a fiber cable is not included to connect the PTRO to the router’s GPON port. Although we will already have a fiber cable at home when using the Movistar HGU, it would have been desirable for the operator to incorporate a new one. Surely when you do a new installation with this router, the technician will bring a version of this router but with the fiber cable incorporated.

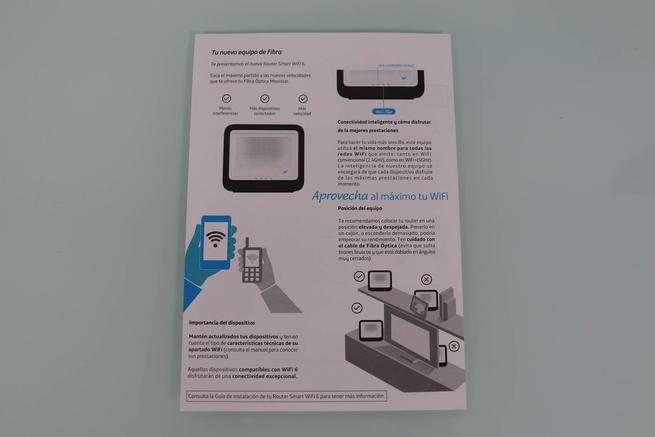
The Movistar operator has incorporated a card with very useful recommendations so that the wireless coverage in our home is perfect. For example, it tells us that the position of the router is essential for good reception throughout the house and for it to be homogeneous, so it is advisable to place it in an elevated area free of obstacles. It is also very important that the devices we connect are updated to the latest software version, and devices with the Wi-Fi 6 standard will achieve better coverage and real speed. It also makes a series of recommendations for where we should not put the router, the main obstacles that greatly interfere with the signal, as well as that we now have the possibility of connecting many more devices than before thanks to WiFi 6, although if you are not using a device it is better to turn it off directly. Finally, he makes us the most important recommendation: if possible, always use the Ethernet network cable instead of WiFi connectivity, since you will have a higher speed and lower latency.
Within the incorporated documentation we also have a small brochure with the conditions of the guarantee, in addition, we have the customer service telephone numbers.
In the user manual that we have available, we can see the contents of the box, a brief introduction to the new router, what the different status LEDs that we have on the front of the router mean, as well as how we must install all the wiring and the initial configuration of the router. It will also tell us how to connect our devices via WiFi, either by entering the WPA2 key, scanning the QR code or using the WPS button. Finally, we can see how the Ethernet network cable connection is made, how to enter the firmware configuration via http://192.168.1.1, how to restore the router to factory settings and what are the customer service numbers.
As for the accessories included with the router, we have a flat Cat5e Ethernet network cable with four pairs of wires, therefore, we can achieve a speed of 1Gbps without any problem.
The current transformer incorporated in this router provides a current voltage of 12V and a current intensity of 2.5A, therefore, we will have a power of 30W to properly feed the router.
This new Movistar Router Smart WiFi 6 router has a completely different design from the previous Movistar HGU, now it is placed vertically since it has a base at the bottom. Movistar’s decision to design a router to have it vertically instead of horizontally is the most successful, customers generally put books, photo frames and other objects on top of the router, which causes poor cooling of the components and even affects the Wi-Fi signal quality. In this way, we prevent someone from putting objects on top, although we must be careful and not place it behind the Smart TV or in a glass cabinet, this would seriously affect the WiFi signal.
On the front of the router we can see the status LEDs of the equipment, from left to right we have the status of IP telephony, status of the 2.4GHz band, status of the 5GHz band and finally the status of the Internet connection. Thanks to these indicators we can know at all times what is happening with the router.
On the left and right side we do not find any buttons or ports, everything is on the back, in this area we will simply see some holes to properly cool the internal components.

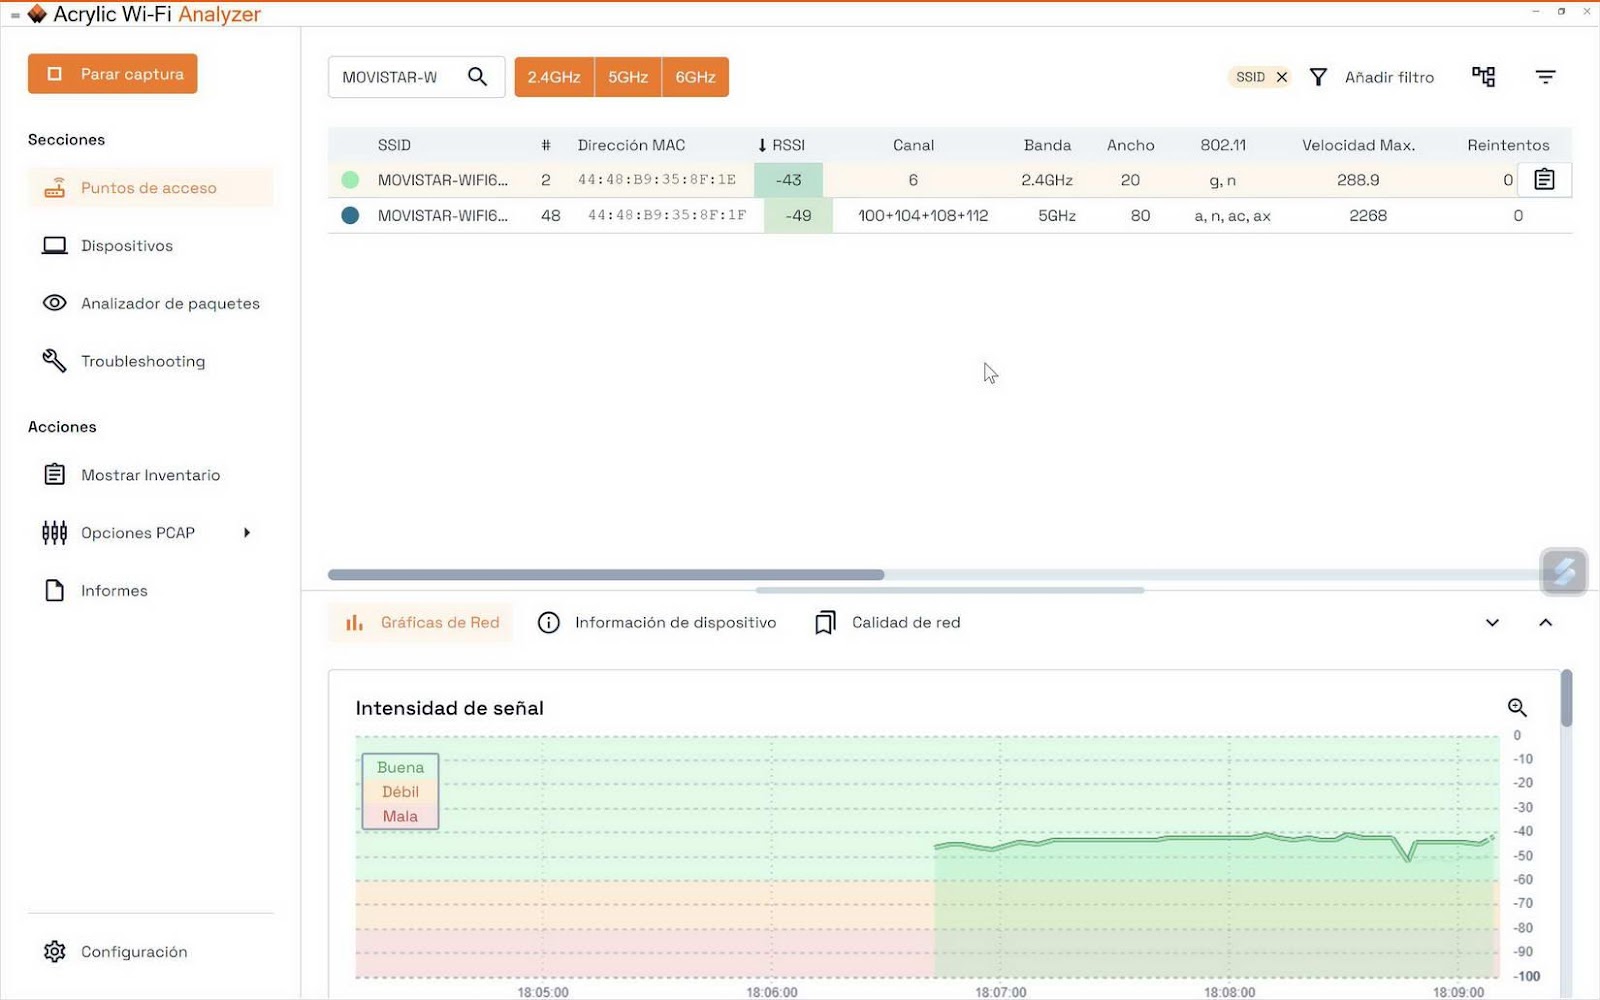
On the back of the router is where we have all the physical connections and buttons. On the left side is where we have the QR code to easily connect to the main WiFi network generated by the router, we must remember that in this new model we will only have one WiFi network called MOVISTAR-WiFi6-XXXX, we no longer have two WiFi networks different (one for 2.4GHz and another for the 5GHz band), is something that we must take into account. We can also see the type of encryption by default, WPA2-PSK, as well as the access password in case we want to set it manually on the different devices.
Just below we can see the GPON fiber port, we have to remove the small plug that we have to protect the connector, and we can insert the fiber cable directly to start working with the equipment.

At the bottom we can see the buttons and Ethernet connections. On the left side we can see the button to turn the 2.4GHz WiFi on and off as well as activate WPS, we can also see the RESET button just below, as well as the button to turn the 5GHz WiFi on and off as well as activate WPS specifically in this frequency band.
Just to the right of these action buttons, we have the four Gigabit Ethernet ports for the LAN. In this model we do not have any 2.5G Multigigabit port, something that would have been highly desirable since the GPON port does have a speed of up to 2.5Gbps, so we could get the most out of it with a PC with a network card that supports these speeds. .
On the right side we can see the RJ-11 telephone socket of the router, we can connect an analog telephone or directly connect this port to a female telephone socket to distribute the signal through all the telephone sockets. In this area we will also have the router’s on and off button, as well as the 12V and 2.5A power connector to power it.
At the bottom of this router we will have a small ventilation grill, we also find a total of four rubber studs to prevent slipping on a surface. The most important thing in this area is that we have a large sticker with the exact model of the router, the Mitrastar GPT-2841GX4X5 v8 , and the access data to the firmware which is through http://192.168.1.1 with the access password that comes on this sticker.
As you can see, this router on a physical level is completely different from the Movistar HGU model, however, we still have exactly the same Ethernet and RJ-11 ports, as well as the buttons that we always had on the HGU.
Now that we know what this router looks like on the outside, we are going to disassemble it and see its internal components.
How Can I Track A Cell Phone Using Snoopza?
Internal analisis
This new Movistar router is really easy to disassemble, we simply have to remove the four screws that we have on the back of the equipment, and separate the two casings to access all its components.
The first thing we see as soon as we disassemble the equipment is a large metal heatsink on the front. We can also see all the internal antenna cables, perfectly connected to the UFL connectors inside the router. In addition, we can also see the internal antennas that we have throughout the router to provide homogeneous coverage.
When we remove the antenna cables from the UFL connectors and take out the board, we can see it underneath and we have a big black heatsink. In this area we will see the different ports and also the buttons. Of course, we can also see the fiber GPON connector, the power supply and some chips. On the back we have the aluminum metal plate, and the UFL connectors that we have seen before.
In the image on the left we can see the WiFi processor that is the Onsemi QT5GU-AX, right next to a RAM memory for this dedicated WiFi processor that we have in the router. In the right area we can see the 5GHz WiFi controller (above) which is the Onsemi QT7510X and the 2.4GHz WiFi controller (below) which is the Onsemi QT6210X. In the lower right area we can see all the electronics of the telephone line and the power supply, in the central area we find the Gigabit Ethernet ports, and on the left the ONT that this router incorporates.
In the image on the right we can see the Realtek RTL9607CP main processor along with the 256MB capacity RAM, the RAM reference is the Micron MT41K128M16JT-125. Just to the left of the RAM we can see the FLASH memory of the main processor, it also has 256MB of capacity and its reference is the MX35LF2GE4AD. In the upper right area we can find the 5GHz WiFi amplifiers (we have four in this area), in the upper left area we find the 2.4GHz WiFi amplifiers (another four), the fifth 5GHz WiFi amplifier is the one furthest to the right of the 2.4GHz ones.
In the first image of the following gallery we can see in more detail the WiFi processor and its RAM, the controllers of both frequency bands. In the second image we can see in more detail the main CPU of the router, the RAM and the FLASH memory. In the third image we can see the 2.4GHz WiFi amplifiers (and one of 5GHz). Finally, in the fourth and last image we can see the four remaining 5GHz WiFi amplifiers with their corresponding UFL connectors to connect the antenna cable.
Once we know the hardware incorporated in this router, we are going to see the real performance that this router will provide us.
What Is AI (Artificial Intelligence)
Test laboratory
The test laboratory for this router consists of LAN-LAN tests with its Gigabit ports, and the corresponding Wireless tests in the 2.0 test scenario, where we can check the coverage and speed of the router in different areas. On this occasion we do not have LAN-WAN tests since we have the GPON WAN port, we do not have an RJ-45 port as in neutral routers.
LAN-LAN tests
In these LAN tests we will use JPerf to see how it behaves with multiple threads on the local network. This test is very important in order to know if we are going to be able to transfer multiple files through the local home network. By having Gigabit ports we can use Jperf without problems, if we have Multigigabit ports it is better to use iPerf3 since it is more realistic.
With 100 concurrent TCP threads we get a transfer speed of 113MB/s, an excellent result. We can see how the threads are transferred at the same speed, this is synonymous with stability in the transfer thanks to a highly optimized firmware.

With 250 threads we get a speed of 112MB/s, excellent performance.

With 500 threads we get a speed of 113MB/s, a perfect performance considering the number of threads.

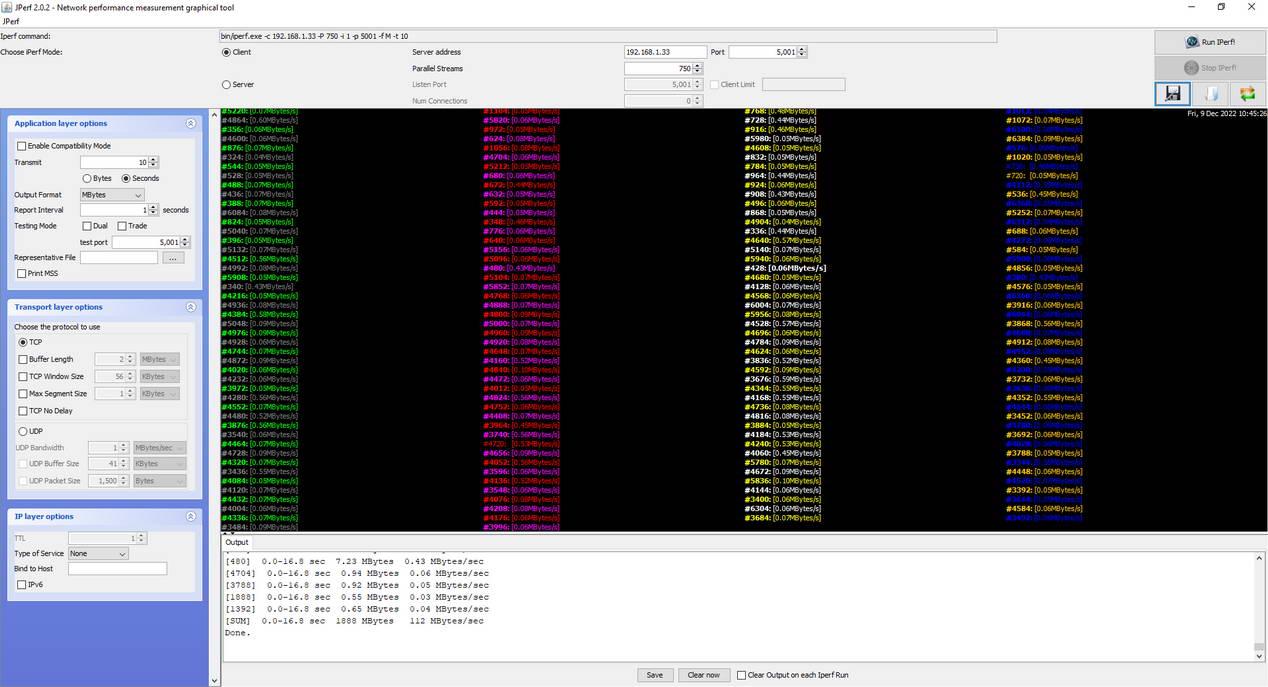
With 750 threads we get a speed of 112MB/s.
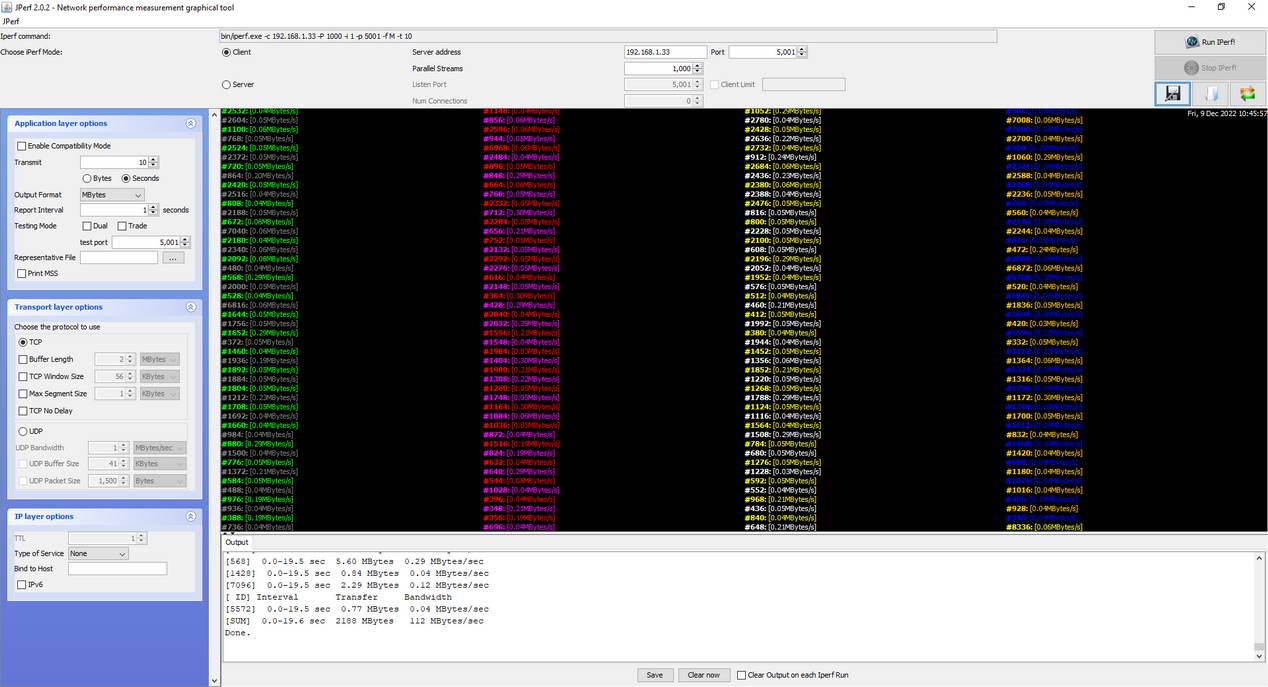
With 1,000 threads we obtain a speed of 112MB/s, an excellent result, this router will provide you with great wired performance regardless of the level of traffic you have.
In the following table you can see the values that we have obtained with different number of threads:
| LAN-LAN wires | 100 | 250 | 500 | 750 | 1000 |
| LAN-LAN | 113MB/s | 112MB/s | 113MB/s | 112MB/s | 112MB/s |
LAN-LAN conclusions
This Movistar Router Smart WiFi 6 router has performed excellently in all the LAN-LAN tests we have carried out. The performance achieved at all times exceeds 900Mbps speed, an impressive performance because we have used up to 1000 concurrent TCP threads. If you are going to use this router with a NAS server in the home network, it will work perfectly without problems.
LAN-WAN tests
In these performance tests we check the speed that we can get from the LAN to the WAN, to check if the hardware NAT of this router works correctly or if there is some kind of problem. We generally use programs like Jperf or Iperf3 to check the real speed and simulate traffic with P2P programs. Logically, in this case it is not possible since the Internet WAN is the GPON port that we have in the router, so we have had to use real P2P programs to see if the speed we get is the maximum of the fiber line.
In the tests carried out we have used the qBittorrent program with the corresponding TCP port open on the router, then we have downloaded several ISO image torrents from different Linux distributions, and also different private Bittorrent tracker files. In total, we have downloaded a total of 10 torrents simultaneously, and the overall speed achieved has been between 100MB/s and 110MB/s, so we are using the maximum of the 1Gbps fiber line. As the torrents were ending, this speed was lower because there were not so many seeds sharing, something completely normal.
With these results and intensive use of BitTorrent, we can conclude that you shouldn’t have any problems making intensive use of the Internet connection, everything will work fine.
Wi-Fi tests
It is time to know if the Wi-Fi 6 performance of this Movistar Router Smart WiFi 6 router is up to the best, or if it is below. We will be able to know the level of wireless coverage as well as the real WiFi speed that we will get at home, and all this in both the 2.4GHz band and the 5GHz band. The Movistar router firmware incorporates band-steering by default with a single SSID and password for both bands, but it can be deactivated without any problem. To carry out these tests, we have proceeded to disable this functionality to test the frequency bands separately.
The physical scenario of the tests is the same as always, as you can see here:
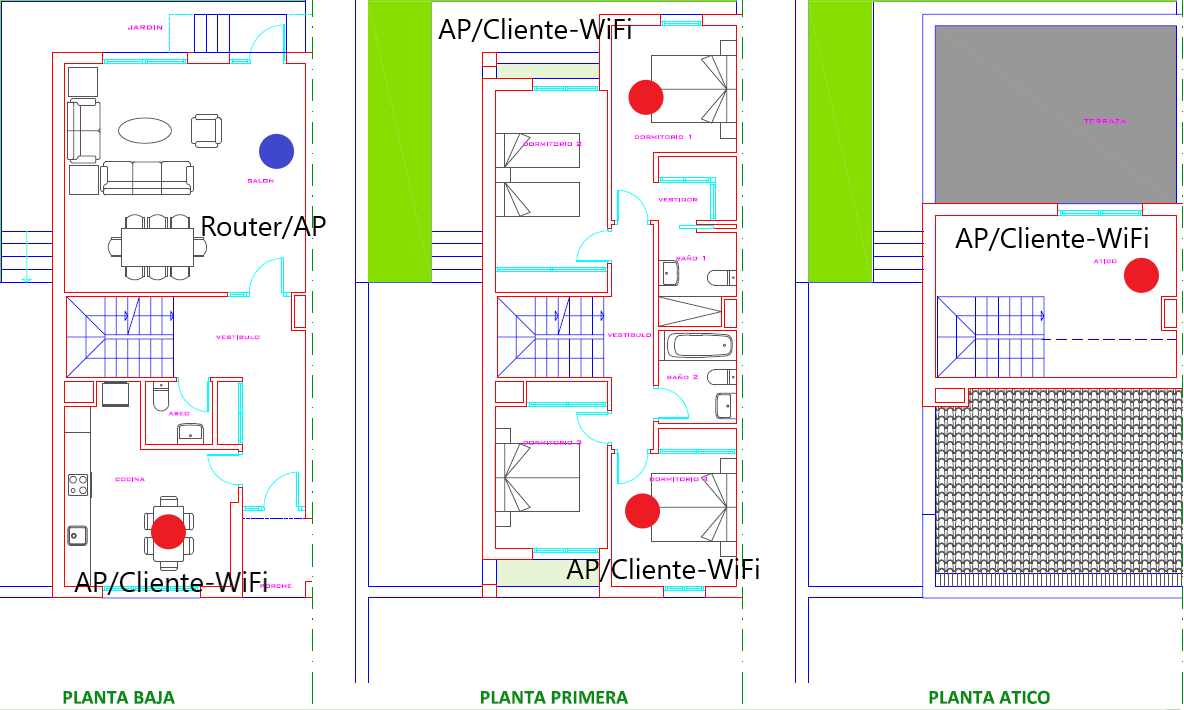
The iperf3 server is located on the local network on a NAS server that is connected via cable to the LAN on the router’s Gigabit Ethernet port. However, we anticipate that we will have a bottleneck if you use the 160MHz channel width, because the download speed reaches the maximum speed of the Gigabit interface. If Movistar launches a 2.5Gbps connection tomorrow, we will be able to exceed Gigabit speed via WiFi 6 in the 5GHz band.
In all the speed tests carried out, the WPA3-SAE encryption method that the router incorporates has been used, changing the WPA2-PSK that comes by default.
2.4GHz band
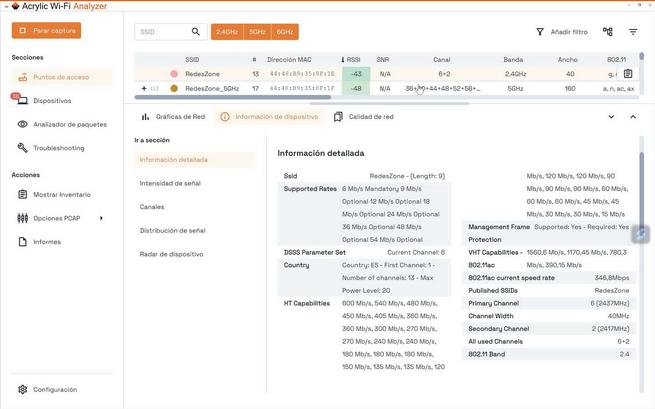
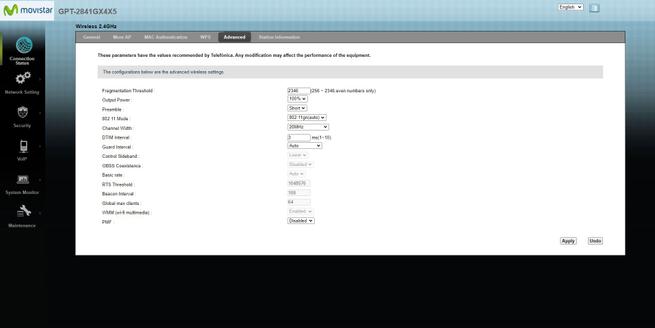
In this 2.4GHz frequency band we can achieve up to 1.148Mbps theoretical with this wireless router, since it incorporates a total of four internal antennas in a MU-MIMO 4T4R configuration. The configuration of the router is to set channel 6 fixed, and activate Auto 20/40 Coexistence and force it to always be working at 40MHz, with the aim of achieving the maximum possible wireless speed. If you live in an area with a lot of WiFi interference on this band, using 20MHz may work better for you. A very important aspect is that by default, this router is configured with the Wi-Fi 4 standard in this band, we have to enable WiFi 6 in the advanced configuration menu.

The WiFi card that we have used in these tests is the Intel AX211 that is in the ASUS Zenbook UX3402 ultrabook, so the theoretical maximum speed that we can achieve in this scenario is up to 574Mbps by having two internal antennas and not four antennas as yes. has the router.


Because the download and upload synchronization speed varies in the 5GHz band if we activate the 160MHz channel width, in the following table you can see the results with the iperf3 client-server with 20 concurrent TCP threads, and using the card Intel AX211, but both in download (iperf3 connection with the -R flag to measure in the download direction) and in upload (normal iperf3 connection to the NAS).
| Movistar Router Smart WiFi 6 | Living room | Kitchen | Main room | room 2 | Penthouse |
| Intel AX211 at 2.4GHz with 40MHz channel width | Sync: 351MbpsSpeed: 28MB/s; 18.5MB/s | Sync: 88MbpsSpeed: 10MB/s; 9.3MB/s | Sync: 59MbpsSpeed: 4.1MB/s;2.3MB/s | Sync: 65MbpsSpeed: 2.6MB/s;1.9MB/s | Sync: 29MbpsSpeed: 0.9MB/s; 0.4MB/s |
As you can see, this router is capable of providing a very good wireless speed, clearly exceeding the real 200Mbps in download in this band, great news considering that it is 2.4GHz speed. Something that we have also liked a lot is the speed obtained over medium-long distances, such as in the main room, and this taking into account that there is a lot of interference from neighboring networks.
5GHz band
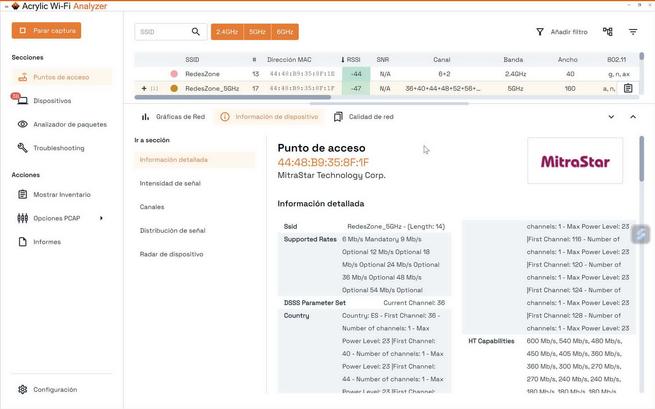
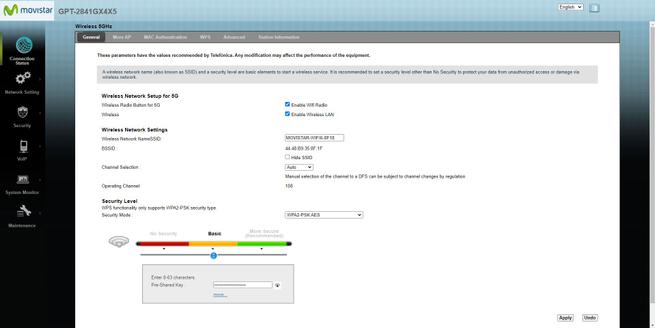
In the 5GHz band is where we will get the best possible WiFi performance. This router has a total of five internal antennas in MU-MIMO 5T5R configuration, by default it comes with 80MHz channel width, but in the advanced firmware configuration we can configure 160MHz channel width. For some reason, if we enable the 160MHz channel width, we can only enjoy it in the download direction (from the router to the PC), and not in the upload direction (from the PC to the router). The default settings for the 5GHz band are as follows:
Here are the results with the iperf3 client-server with 20 concurrent TCP threads, 80MHz channel width and using the Intel AX211 card.
| Movistar Router Smart WiFi 6 | Living room | Kitchen | Main room | room 2 | Penthouse |
| Intel AX211 at 5GHz with 80MHz channel width | Sync: 1200MbpsSpeed: 98MB/s; 85MB/s | Sync: 649MbpsSpeed: 45MB/s; 27.5MB/s | Sync: 490MbpsSpeed: 46.5MB/s; 20.5MB/s | Sync: 29MbpsSpeed: 8.9MB/s; 3.1MB/s | Sync: 29MbpsSpeed: 1.9MB/s; 1.6MB/s |
As you can see, this router is capable of providing a great WiFi speed, since we have reached almost 800Mbps download speed and almost 700Mbps upload speed in the place closest to the router. As you have seen in the table, the download and upload speeds vary a lot, we always get a higher download speed when it should be more or less similar.
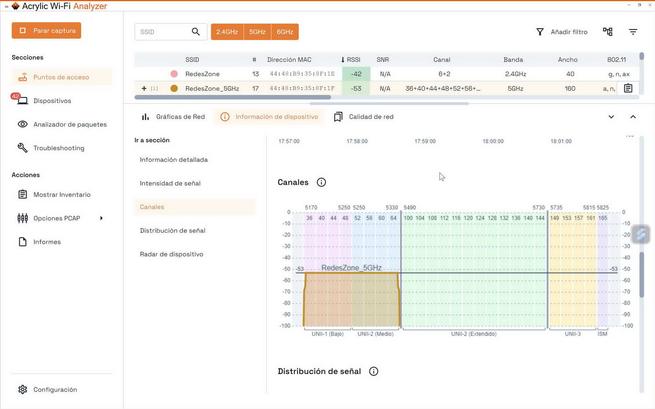
If we activate the 160MHz channel width, the possibility of choosing an automatic channel will be disabled , in addition, something very interesting is that the option of using the UNII2-Extended channels is also disabled, that is, the channels from 100 up, directly they disappear from the firmware and there is no possibility to select them even manually. If we previously configured channel 100 or higher as “fixed”, when activating the 160MHz channel width directly, the WiFi network will not be operational, it is necessary to configure the “low channels” from 36 for it to work .

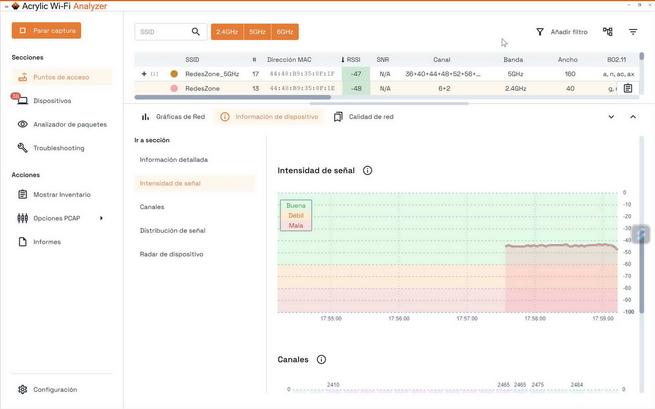
Another aspect that has caught our attention is that by activating the 160MHz channel width, we will only have additional speed in the download direction , not in the upload direction, as you can see in the following image. This means that by activating this feature, we only benefit from Wi-Fi downloading, and not uploading, since it will remain exactly the same, and we have verified that we obtain more or less the same speed, there are very insignificant changes.

Because the download and upload synchronization speed varies in the 5GHz band if we activate the 160MHz channel width, we have tested with iperf3 both in the download direction (with the -R flag) and in the upload direction (with the configuration of the Regular customer). In the following table you can see the results with the 160MHz activated and the Intel AX211 WiFi card
| Movistar Router Smart WiFi 6 | Living room | Kitchen | Main room | room 2 | Penthouse |
| Intel AX211 at 5GHz with 160MHz channel width. | Sync: 1200MbpsSpeed: 111MB/s; 102MB/s | Sync: 576MbpsSpeed: 90.5MB/s; 30.5MB/s | Sync: 432MbpsSpeed: 68.5MB/s; 25.1MB/s | Sync: 59MbpsSpeed: 8.8MB/s; 2.0MB/s | Sync: 34MbpsSpeed: 1.3MB/s; 0.9MB/s |
As you have seen, by activating 160MHz we are going to achieve a higher WiFi speed in the download direction, far exceeding the real 900Mbps, in fact, we believe that we have a bottleneck with the Gigabit Ethernet interface, since we should get a little more real speed, about 130MB/s approximately judging by the sync speed. However, the result obtained is really impressive since we are talking about an operator router that we can currently buy for only €50 if you install it yourself. In the tests in the other rooms and rooms, we have verified that activating this 160MHz function will allow us to achieve quite a significant extra download speed, and we can even appreciate that the upload speed has also improved a bit.
In the following image you can see a quick Internet speed test with the 160MHz channel width activated, and the location is in the same room as the router:
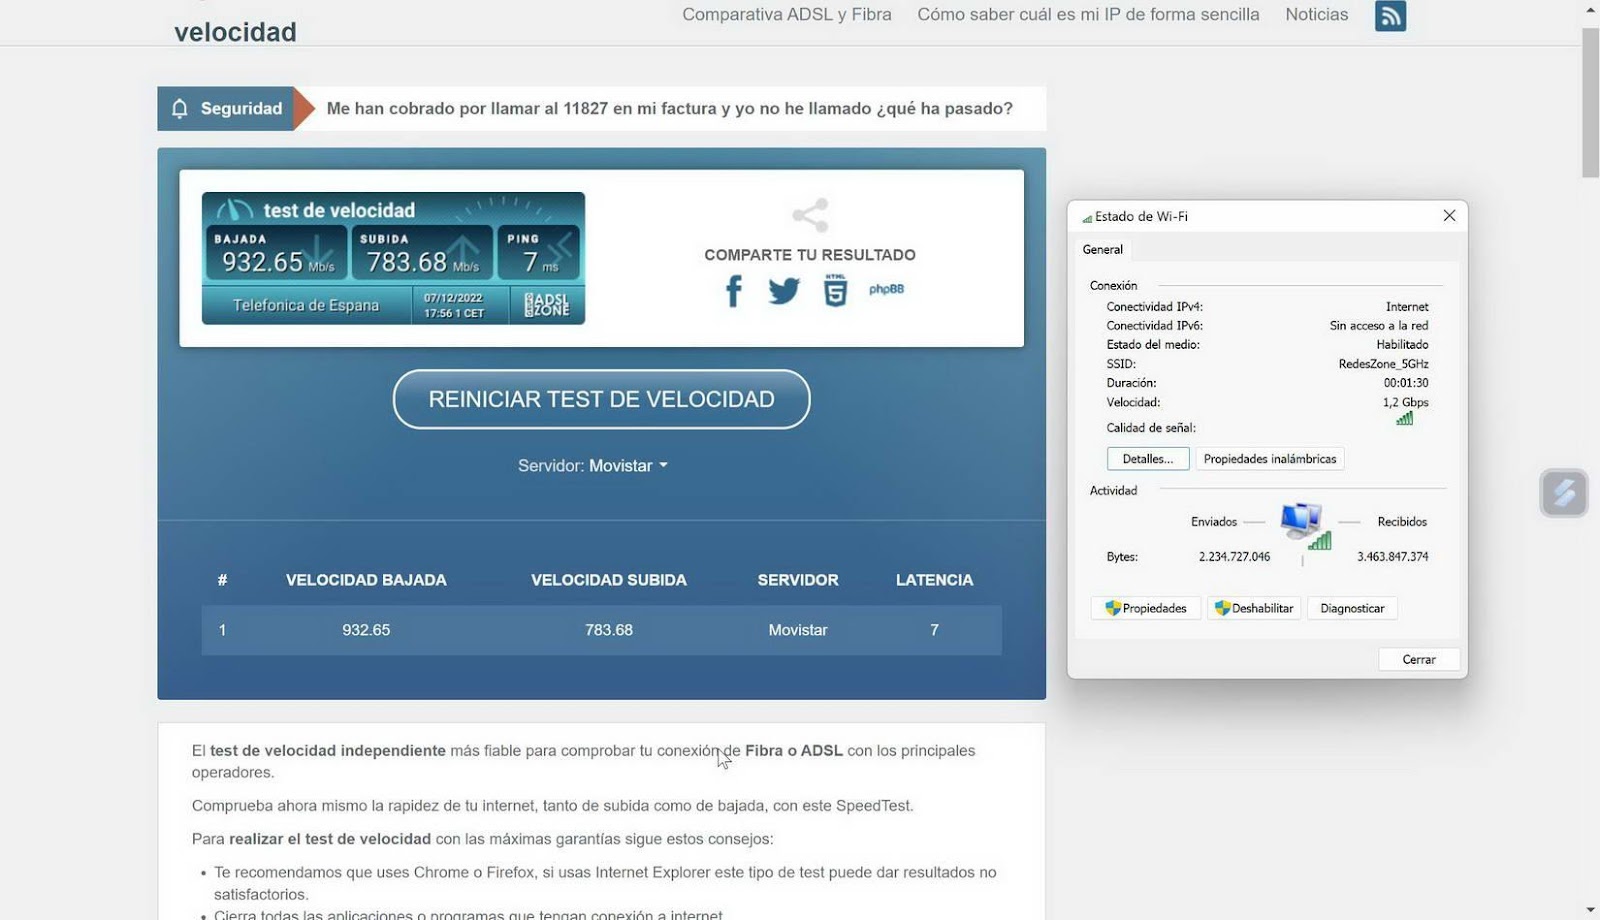
We are able to achieve the maximum speed of fiber optics over WiFi in download, although in upload it is a bit far from achieving maximum speed.
Wireless Conclusions
In the 2.4GHz band, this router has performed outstandingly in all tests, achieving more than 220 real Mbps in places close to the router. The speed that we have achieved in medium-remote places has been clearly lower, due to the fact that we have interference from other nearby WiFi networks, however, we have managed to connect in all the test locations.
In the 5GHz bandIt has performed excellently, achieving download speeds of up to 930Mbps and upload speeds of just over 800Mbps, perfect for making the most of Movistar’s 1Gbps fiber optics. One aspect that we must highlight is that we can use 80MHz or 160MHz of channel width, in the tests we have verified that using 160MHz of channel width is clearly better in nearby places and also in remote places, since we have achieved a higher WiFi speed in all locations using this channel width, including the furthest away (except attic). Our recommendation is that you activate 160MHz if you have WiFi cards or devices compatible with it, otherwise, do not activate it because you will not be able to use channels from 100, for some reason the router firmware does not allow it.
In the following table you can see a complete summary of all the tests with iperf3 in the download and upload directions:
| Movistar Router Smart WiFi 6 | Living room | Kitchen | Main room | room 2 | Penthouse |
| Intel AX211 at 2.4GHz with 40MHz | Sync: 351MbpsSpeed: 28MB/s; 18.5MB/s | Sync: 88MbpsSpeed: 10MB/s; 9.3MB/s | Sync: 59MbpsSpeed: 4.1MB/s;2.3MB/s | Sync: 65MbpsSpeed: 2.6MB/s;1.9MB/s | Sync: 29MbpsSpeed: 0.9MB/s; 0.4MB/s |
| Intel AX211 at 5GHz with 80MHz | Sync: 1200MbpsSpeed: 98MB/s; 85MB/s | Sync: 649MbpsSpeed: 45MB/s; 27.5MB/s | Sync: 490MbpsSpeed: 46.5MB/s; 20.5MB/s | Sync: 29MbpsSpeed: 8.9MB/s; 3.1MB/s | Sync: 29MbpsSpeed: 1.9MB/s; 1.6MB/s |
| Intel AX211 at 5GHz with 160MHz | Sync: 1200MbpsSpeed: 111MB/s; 102MB/s | Sync: 576MbpsSpeed: 90.5MB/s; 30.5MB/s | Sync: 432MbpsSpeed: 68.5MB/s; 25.1MB/s | Sync: 59MbpsSpeed: 8.8MB/s; 2.0MB/s | Sync: 34MbpsSpeed: 1.3MB/s; 0.9MB/s |
Now that you know the real speed of this router in different tests, we are going to show you a quick comparison of WiFi speed with the old Movistar.
WiFi comparison with Movistar HGU
Our Movistar HGU router is the Askey HGU RFT3505VW model, we have compared it in WiFi in some quick tests with this new Movistar Smart Router WiFi 6 using the typical speed test, and being in the same room where the router is. The results are given below:
With the Movistar HGU RFT3505VW in the 2.4GHz band we have achieved:

With the Movistar Router Smart WiFi 6 in the 2.4GHz band we have achieved:

With the Movistar HGU RFT3505VW in the 5GHz band we have achieved:

With the Movistar Router Smart WiFi 6 in the 5GHz band with 80MHz channel width we have achieved:

With the Movistar Router Smart WiFi 6 in the 5GHz band with 160MHz channel width we have achieved:

As you have seen, the new router is clearly superior in WiFi to its predecessor.
Now that you know what the real performance of the Movistar router is like, we are going to teach you everything about the basic menu of the firmware of this equipment.
Basic Firmware Options
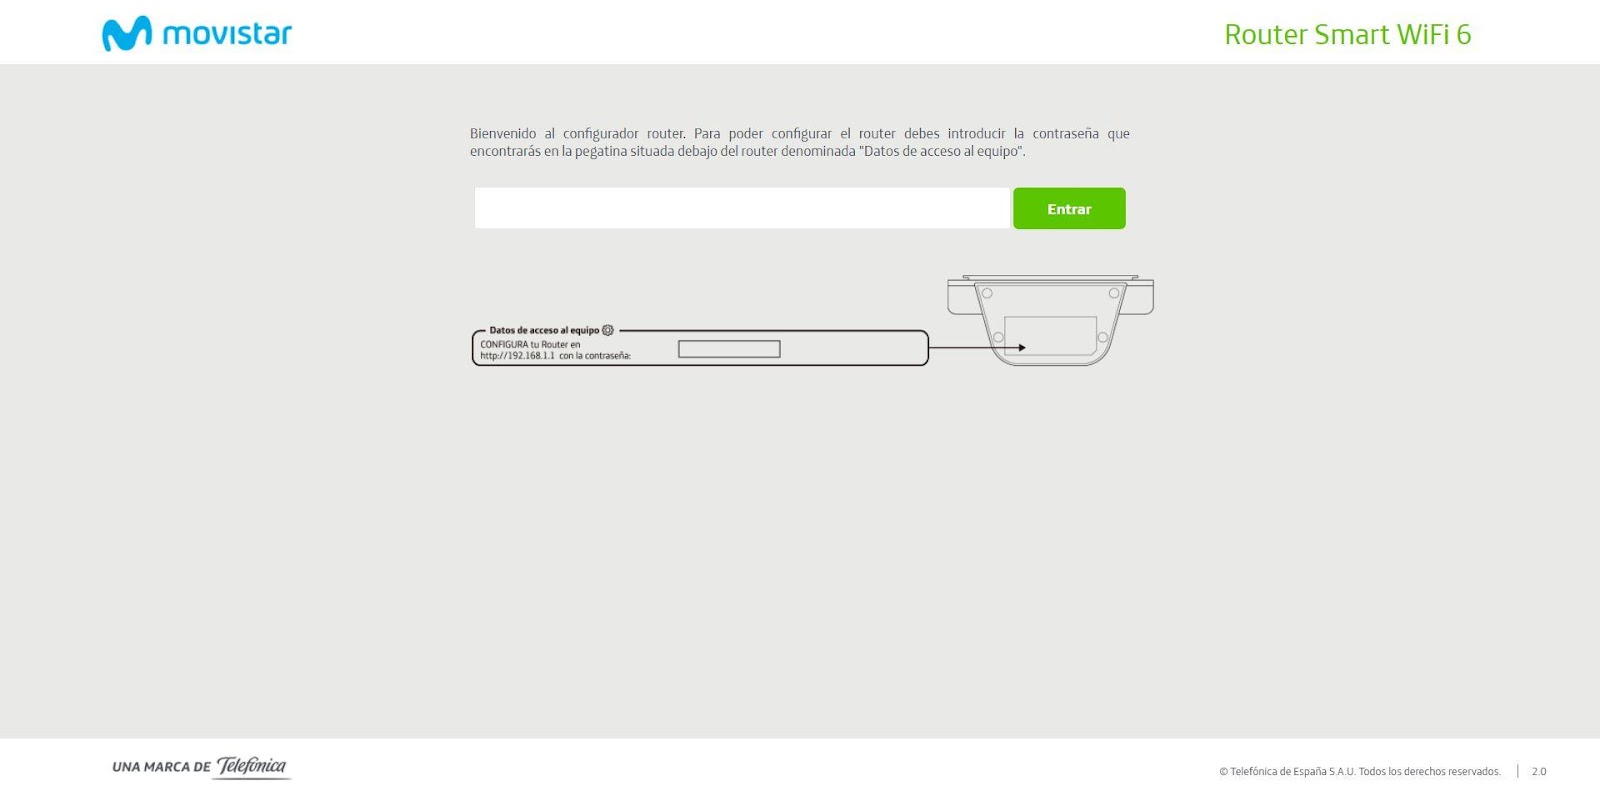
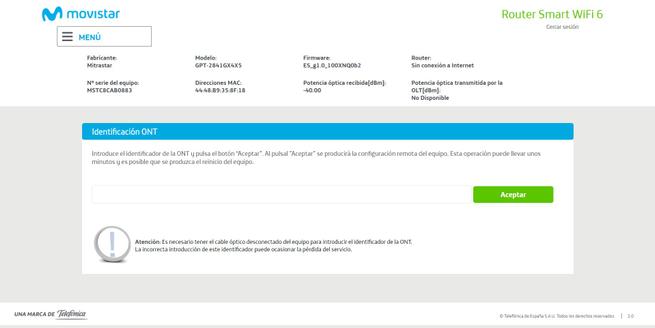
To access the firmware of the Movistar router, we must enter the address http://192.168.1.1 and enter the access password that we have in the lower part of the equipment, just below the base, that is the default password that we should change as soon as possible. In the event that you want to configure the ONT or Idont identifier, you will have to enter the address http://192.168.1.1/instalacion with the fiber cable disconnected and proceed to put the Idont of your connection.
When we enter the URL http://192.168.1.1, the first thing we will see is a menu to enter the device password, as indicated by the firmware itself to help less expert users how to get this access password.
By entering the password, we can access all available firmware configuration menus.
ONT identifier (IDONT)
In the case of accessing the URL http://192.168.1.1/instalacion, we will also have to enter the default access password of the sticker. Upon entering we can see the manufacturer of the router, the exact model of the equipment, the firmware version, the serial number of the equipment, MAC address, optical power received as well as optical power sent by the OLT.
When we connect the router for the first time, it is possible that we do not have the latest firmware version for this router as it happened to us who have the b2 version. As soon as we proceed to introduce the Idont and connect it to the fiber network, we wait about 10 minutes and the latest version will automatically be downloaded, installed and restarted to apply all the changes correctly with our profile. Also, if we go to the services section, we can already see that our connection is “Trio”, that is, we have Movistar TV.


Once you have configured the Idont, the router has been connected to the Movistar fiber network and it has been updated, we can see the different configuration menus available.
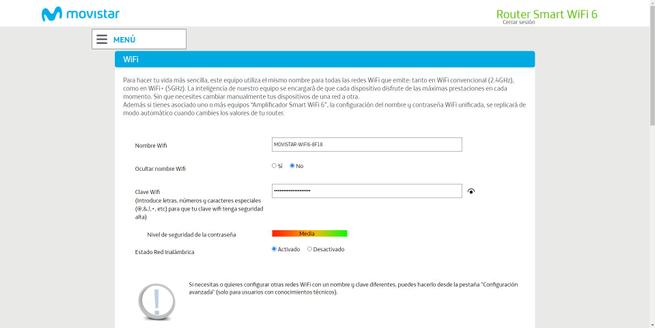
WiFi, WiFi Plus and Guest WiFi
In these configuration menus we can define the WiFi network name (SSID) of the 2.4GHz and 5GHz band, because by default we have band-steering enabled. Any change we make in the 2.4GHz or 5GHz band will automatically also be reflected in the other frequency band to always maintain the same SSID and password. In these 2.4GHz menus we can also configure the WPA2 password, which will also be automatically reflected in the 5GHz band.
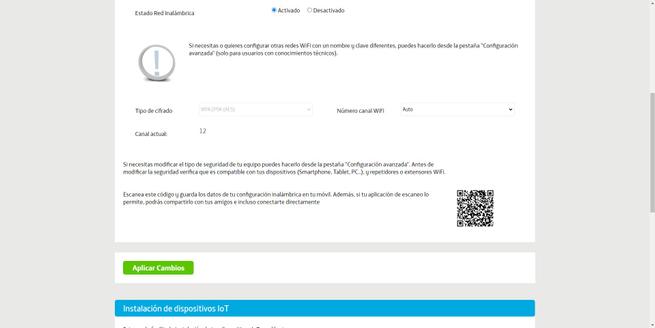
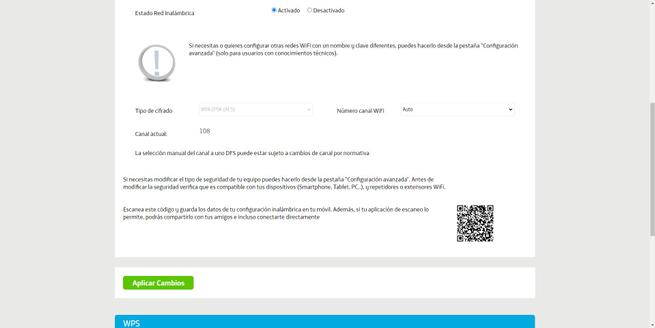
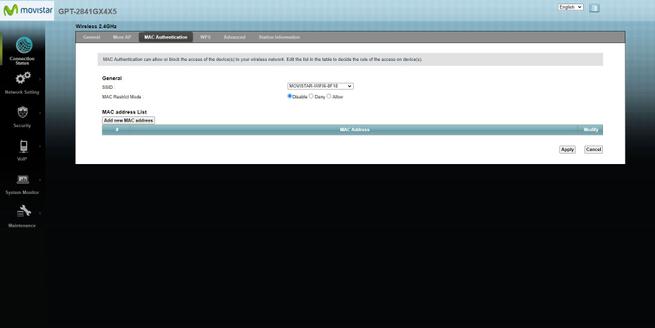
Other options available here are to activate or deactivate the WiFi network, change the router’s broadcast channel, view the QR code to easily connect smartphones and tablets, as well as activate an “IoT device installation” mode that allows you to deactivate the band 5GHz momentarily. We also have the possibility of enabling WPS by pressing the physical button, as well as configuring the router’s MAC filtering in this frequency band.
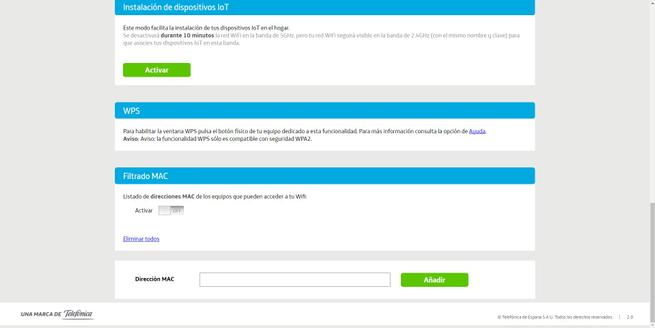
The options available in the 5GHz band are exactly the same as the 2.4GHz band, we can change the SSID, WPA2 password, change the WiFI channel, disable or enable this frequency band, configure WPS as well as MAC filtering. Remember that we have band-steering activated, so any change in the WiFi network name or password will be automatically reflected in the other frequency band.


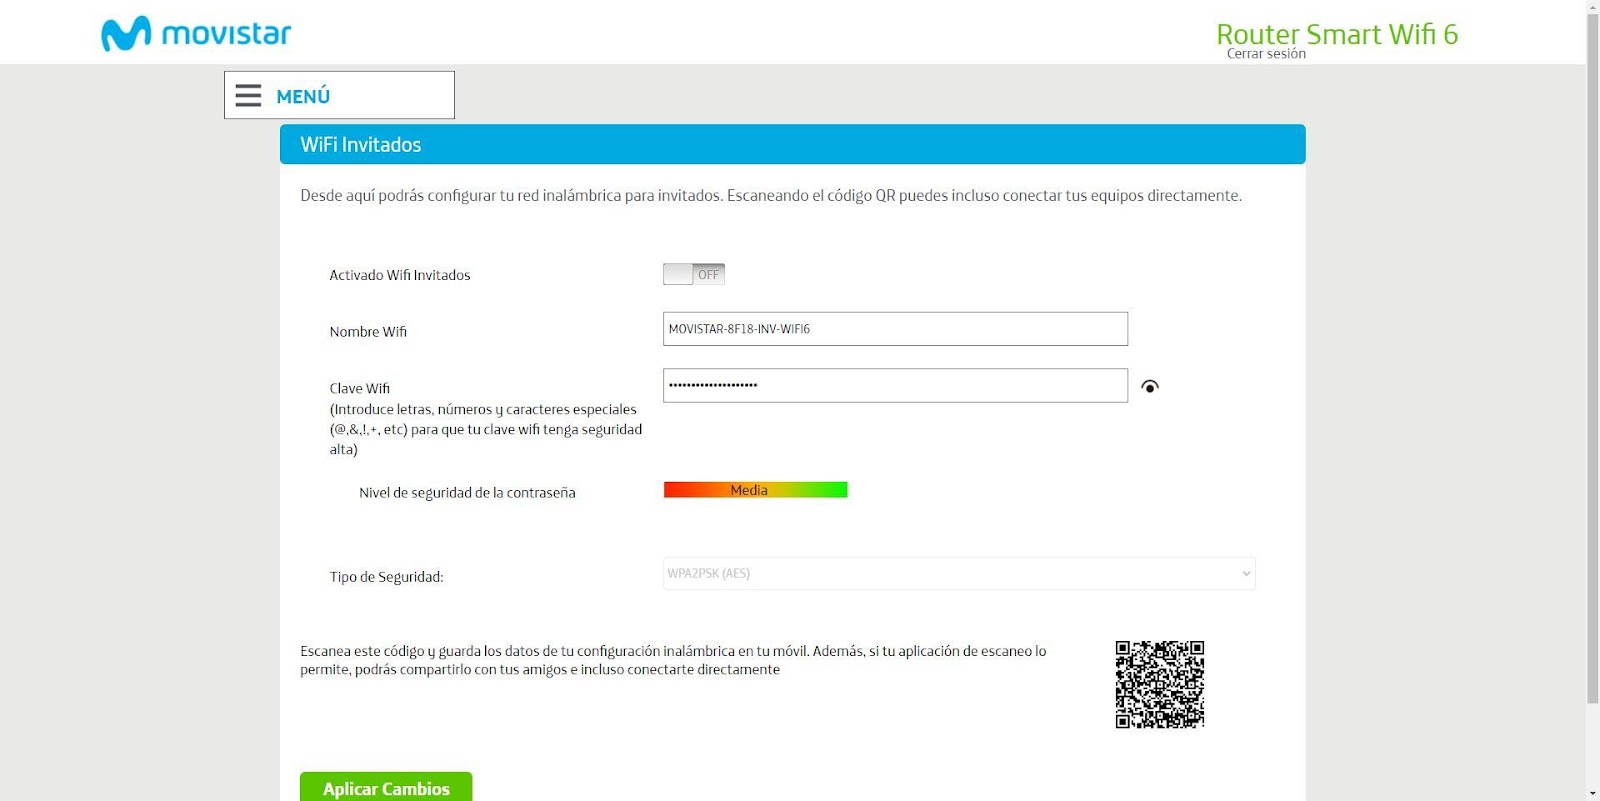
If you want to enable the guest WiFi network, you can do it from this Guest WiFi menu in the basic menu, however, you should know that this guest WiFi network will only be available in the 2.4GHz band and not in the 5GHz band. If you want to create a guest WiFi network on the 5GHz band, you will have to go into the advanced settings menu and enable a second SSID on the 5GHz band.
Now that you know all the options available in the basic WiFi menu, let’s see the other available menus.
ports
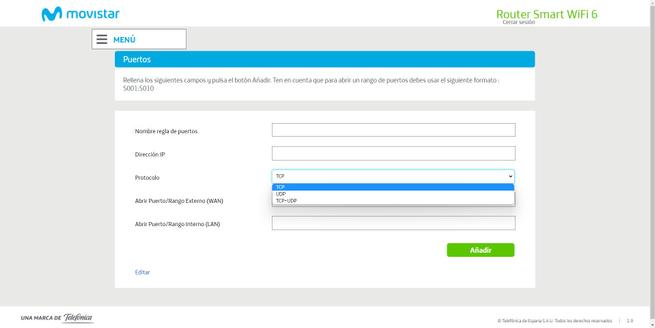
If you want to open one or several ports to different wired or wireless devices on the local network, from the ” Ports ” menu you will be able to do so without any problems. In this menu you can configure the name of the port rule to create, the IP address where you want to open the port, the TCP or UDP protocol or both, as well as the port or range of ports to open in the Internet WAN and also in the lan.


A very important aspect before opening ports is that you should set a fixed private IP to the different computers to which you want to open them, to avoid problems in case of IP change. This is done in the advanced configuration menu quite easily, we can use the Static DHCP of the router itself to avoid having to put a fixed IP on the computer.
local network map
In the “Local network map” menu we can see a small diagram of the different equipment that we have connected to the local network, whether wired or wireless.
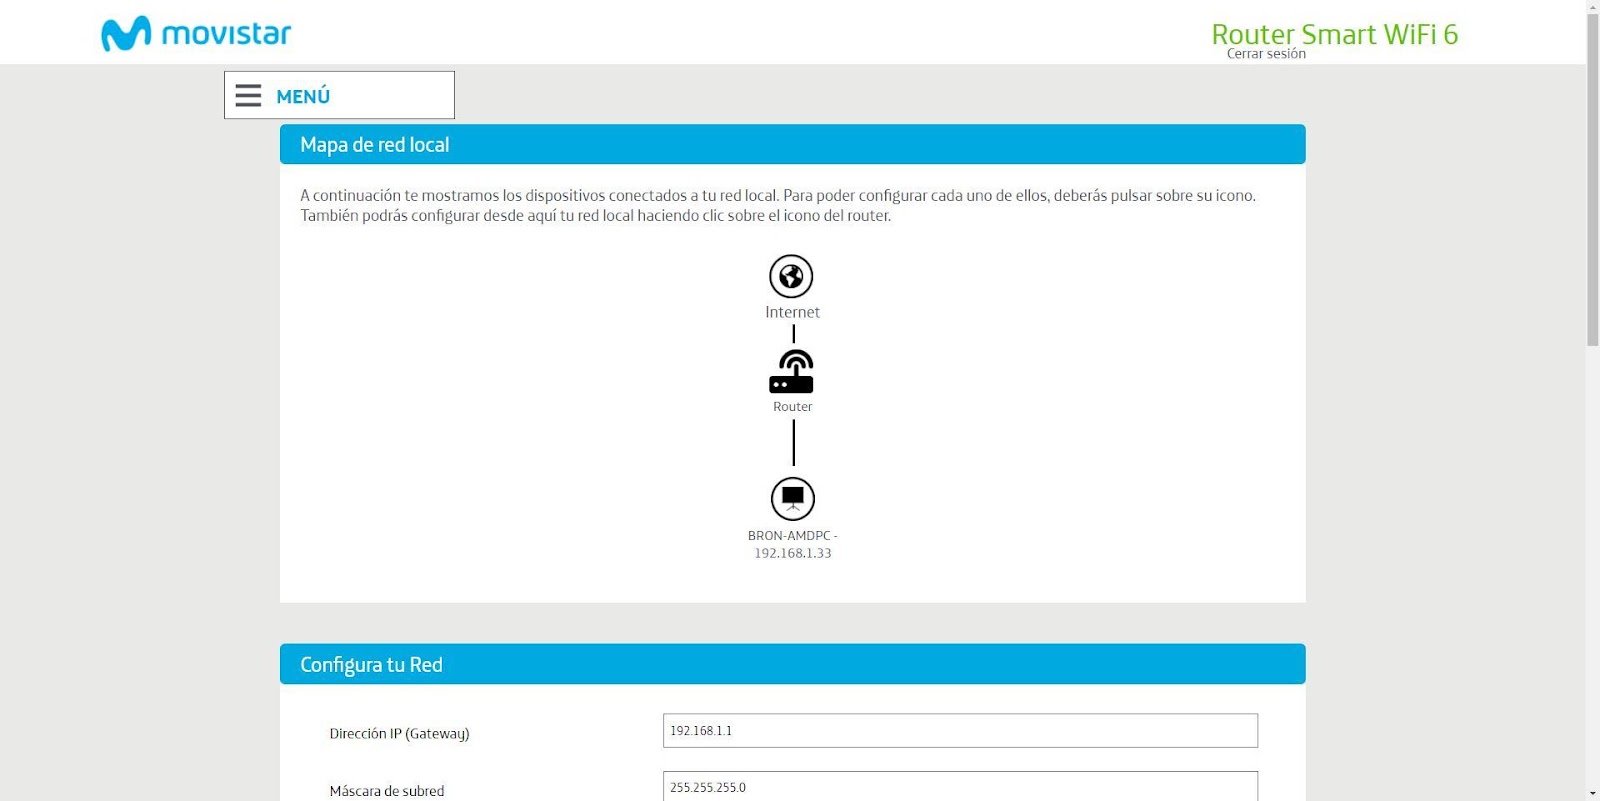
At the bottom we can configure the IP address of the router, its subnet mask, the DHCP server with the start and end IP, as well as the DNS servers. We can also see the status of the multi-user or single-user configuration, as well as the dynamic and static addressing (the latter is the IPTV configuration).
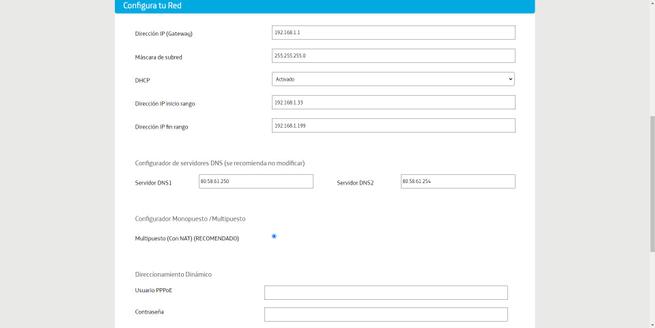


As you can see, we have the possibility to change the subnet of the Movistar router without problems, and with its corresponding DHCP server.
Local network
In the « Local network » menu we can see the same information but summarized, we can only see the data of the current subnet, the DHCP server and also the DNS servers that we are currently using.

Initially, you would not have to change the router’s typical 192.168.1.0/24 subnet, however, you could change the DHCP server’s range to start with the first available host address, which is 192.168.1.2. However, Movistar leaves these 32 IP addresses so that you can put a fixed IP address outside the DHCP range for the devices you want.
Multi-user/Single-user
If you want to put this router in single-user mode to later use a high-performance neutral router, you can easily do so through the ” Multi-user / Single-user ” configuration menu. Remember that if you set the router to standalone, you will have to establish a PPPoE connection with the usual user data adslppp@telefonicanetpa and the password adslppp.
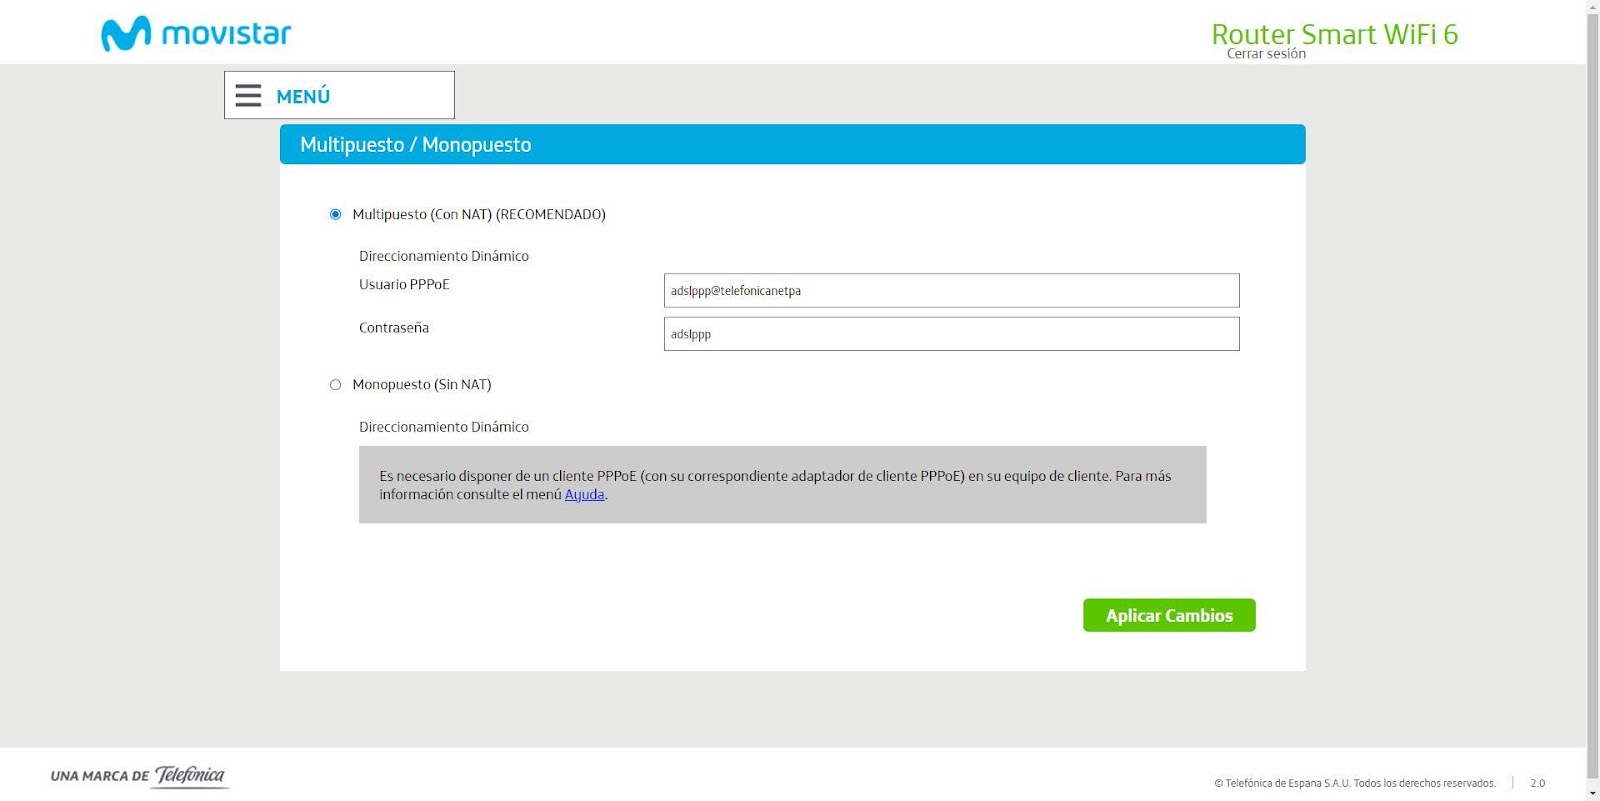
In addition, in single-user mode we do not have to use any VLAN ID, since the router sends the Internet connection in untagged mode (without label).
IPv6 local network
Movistar has launched this router with everything ready for compatibility with the IPv6 protocol. As soon as the operator begins to deploy this network protocol, this router will be compatible and we will be able to have a public IP address on each end device, whether wired or wireless, following the standard.

In this menu we can also configure the ports, although in an IPv6 network we have routable addresses on the Internet, any that starts on the Internet and has a device on our local network as its final objective, will find the firewall or firewall. For this reason, we will have to “open” a port and define the name of the port, what is the IPv6 address of the device, configure the protocol TCP, UDP or both, as well as open the port or range of ports in question.

Although with IPv6 networks we will not have NAT (although it exists, and is used in certain specific cases), we do have a firewall so we also have to open the corresponding ports.
router password change
One of the most important recommendations to make the first time you get into the firmware is to change the password of the router to have greater security. In this menu we have to enter the previous password, put the new password that we want and confirm this new WiFi password.

By clicking on “Accept” you will automatically close the session in the router, and we will have to re-enter the password (this time it is the new password that we have indicated) to access the router again.
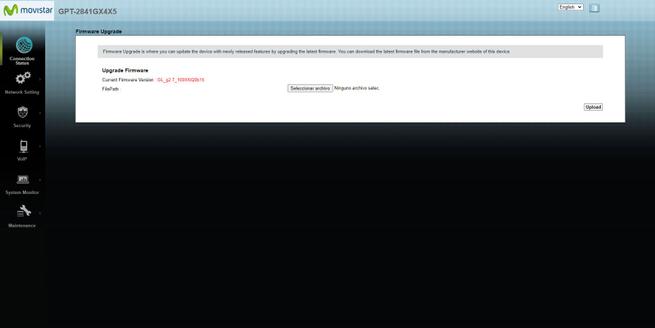
Firmware update from PC
In the event that Movistar has provided you with a firmware for your router and you have to update it manually, from this configuration menu you can do it without problem, selecting the file in question and clicking on the “Update” button.

Remember that after a firmware update, the router will automatically reboot.
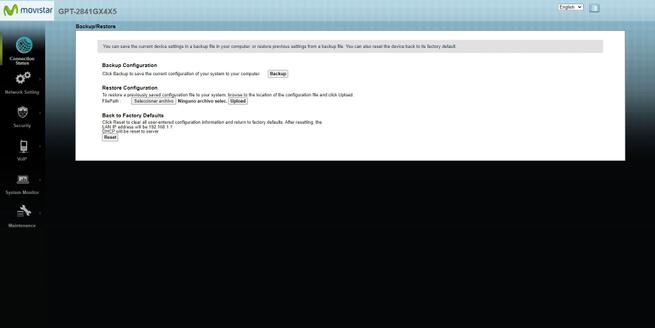
management options
In the management options menu is where we can save the current configuration of the Movistar router, we can also load a previously saved configuration, reset the device to factory settings, as well as go directly to the advanced menu of the firewall and activate the UPnP that is disabled by default.
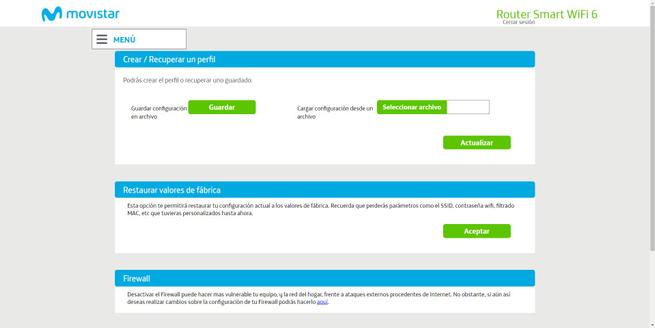


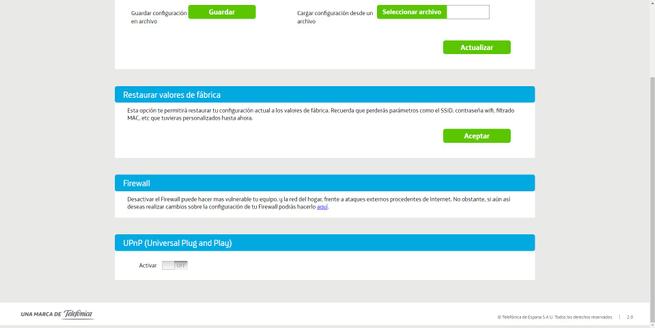
Something that we really liked to improve the security of the local network is that we have UPnP deactivated, in this way, we will be preventing a device from opening ports autonomously without asking first, perfect for us to have complete control of all the ports.
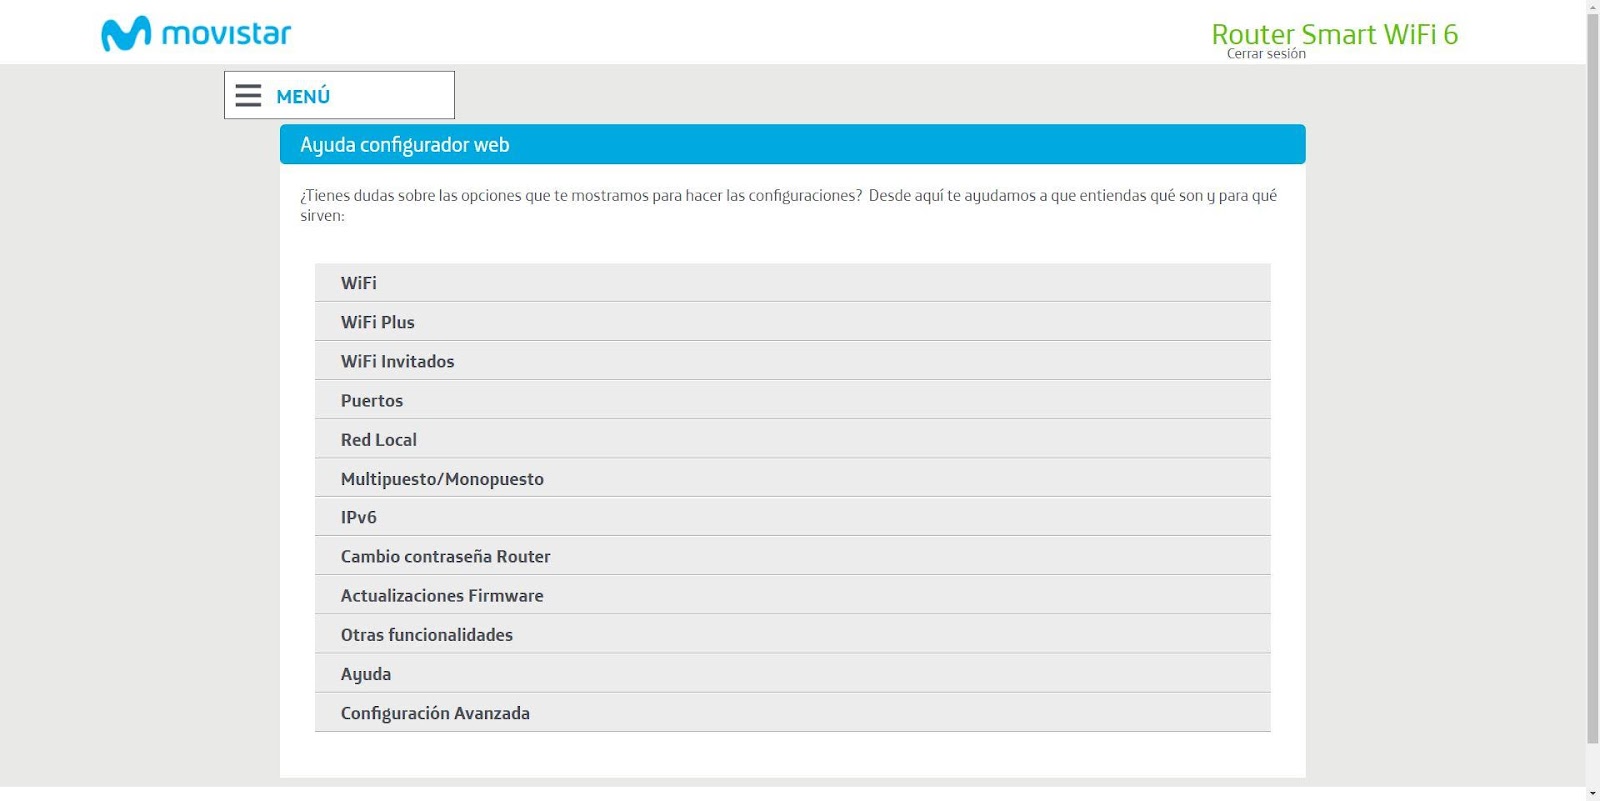
Aid
The Movistar ” Help ” section is really complete, if you have any questions about what a technical term means in the router’s basic configuration menu, in this section you have all the details.
In the ” About… ” menu you can see internal information of the router, such as the exact model of the router, hardware and firmware version, as well as the public Internet IP address. We also have other information related to the local network such as the configured subnet, DHCP server, DNS server, basic WiFi network configuration, Movistar TV information as well as the ONT identifier.

As you have seen, in this “About…” menu we can see the general status of the router in a very simple way.
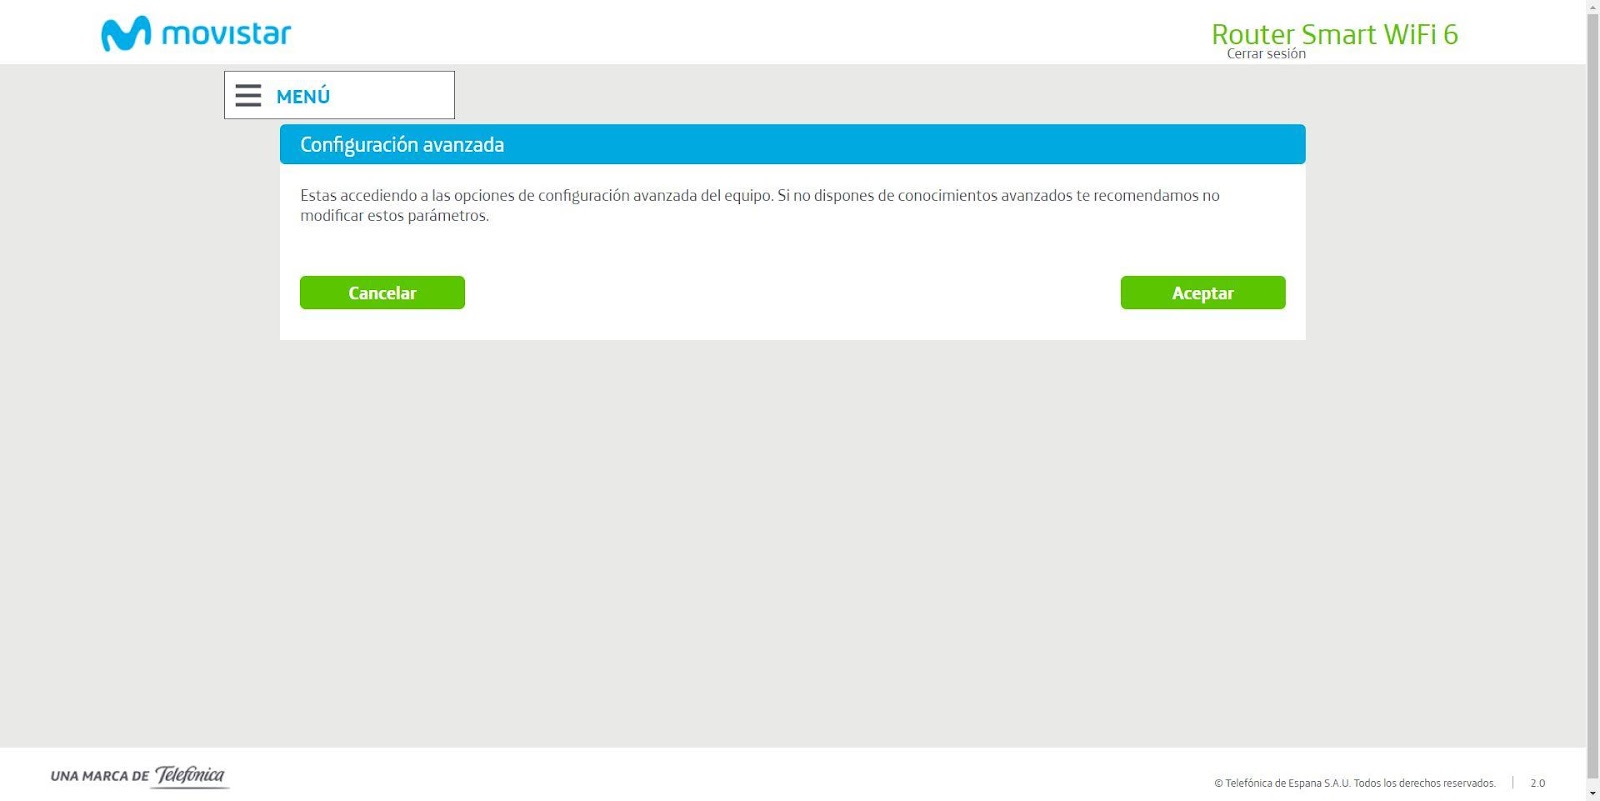
Advanced configuration
Finally, the last option available in this basic menu is precisely the access to the “Advanced Configuration” of the router, to enter this advanced menu we have to click on the “Accept” button and it automatically redirects us to the new advanced management menu.
So far we have come with all the configuration options of the basic firmware of the Movistar Router Smart WiFi 6, if you want to see a video where we explain the 5 configurations that you should do to make it work optimally, you can see it here:
Now we are going to fully enter all the advanced firmware configuration options.
Advanced Firmware Options
In the “Advanced configuration” menu we can have access to all the options available in the router’s firmware, if you need to make any settings that are not available in the basic menu, they will be available in this advanced menu. Next, we are going to explain in detail all the configuration menus that we have available.
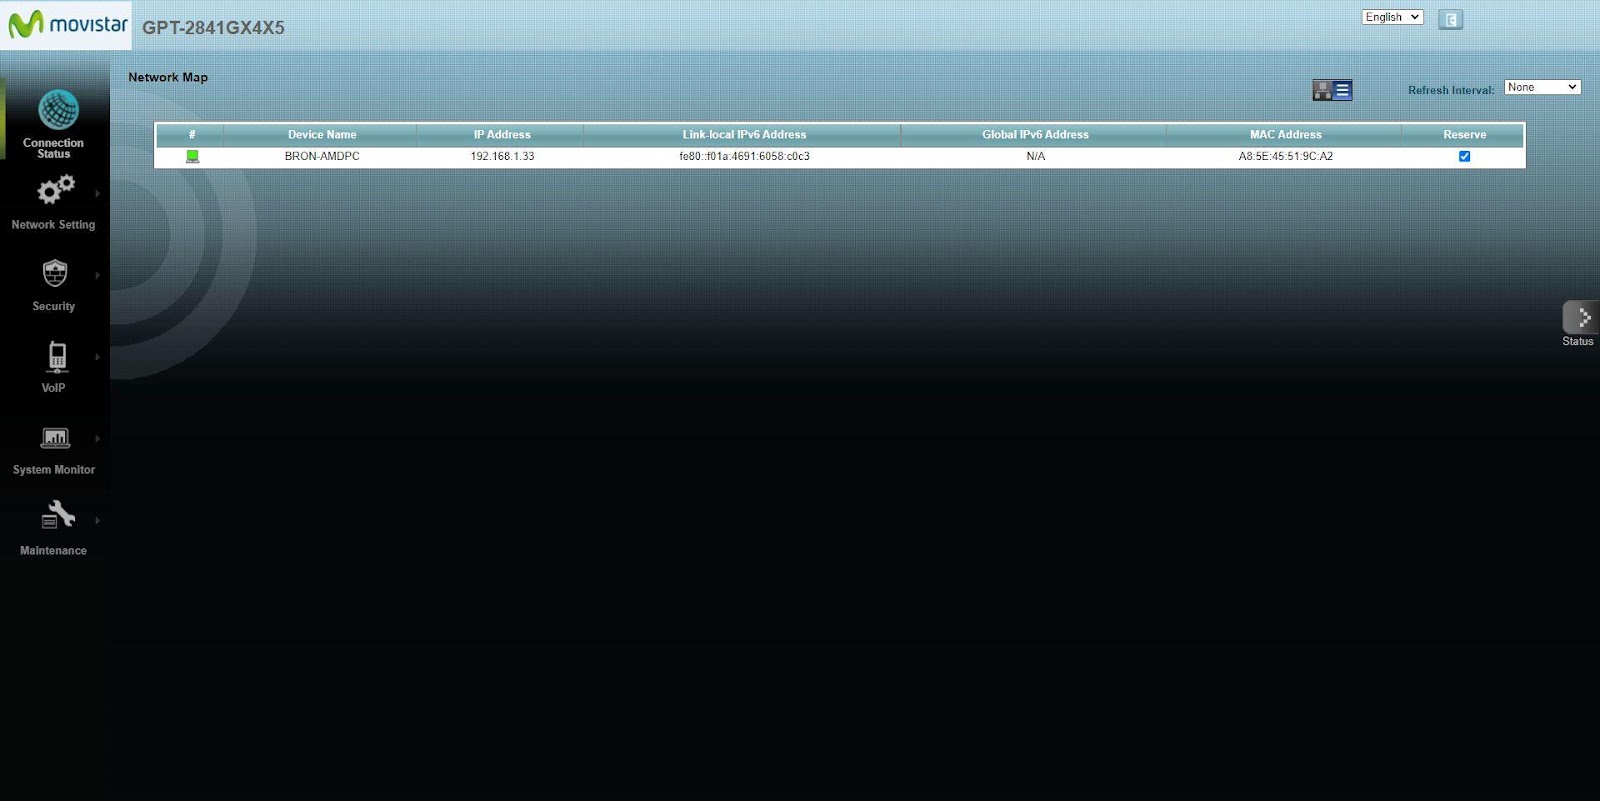
Connection Status
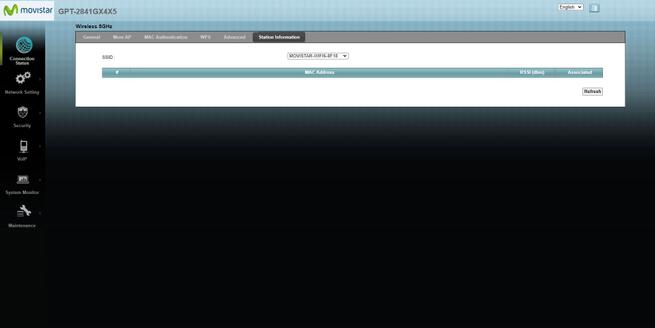
In the “Connection Status” menu we can see a simple network diagram of how the different devices are connected to the local network, either via WiFi or via cable. In addition, we can put the view in the form of a graph or in the form of a list, to have a list of all the clients with their corresponding MAC addresses and IP addresses.

If we click on any of the connected devices, a new pop-up window will open with the IP address of the device, the IPv6 link-local address, the IPv6 address by SLAAC/DHCPv6 and also the MAC address of the device in question.

If we click on the list view, the name of the device will also appear as well as a “Reserve” option to reserve the private IP address and set it fixed in the Static DHCP menu. The only thing we do when reserving it is to add it to the Static DHCP list, but it does not mean that Static DHCP is already configured automatically, we must do it manually later.
In this simple menu we can have a global vision of the entire local network, both wired and wireless.
Network Settings
In the ” Network Settings ” menu is where we have all the options available for the local network and Internet. If you need to configure any parameter in an advanced way, this is where you should do it.
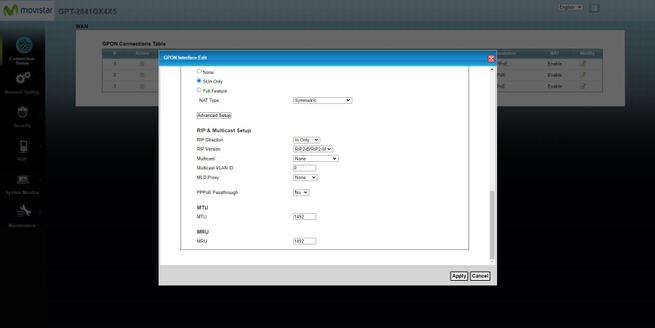
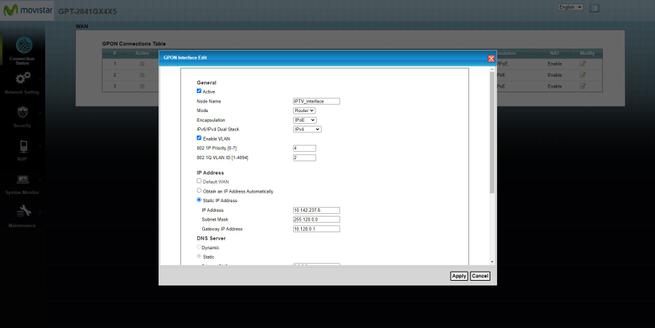
In the ” WAN ” section is where we have the different interfaces, having triple-play, we will have three interfaces: Internet, VoIP and IPTV. If we click on “Modify” we can see that we have the possibility of modifying different parameters, such as the DNS servers used in the WAN and even putting all the interfaces in “bridge” mode instead of router mode, but we anticipate that we have tried to put them all in “bridge” and does not pass any VLAN to another router that we have placed, not even the Internet VLAN in bridge mode with VLAN tagged works. It is mandatory to put the single user mode in the basic menu so that the router creates a new interface with the Internet VLAN in untagged mode, then we can establish a PPPoE connection.


In the ” Wireless 2.4GHz ” menu we can see all the advanced configuration options of the WiFi network of this frequency band, we can enable or disable the physical button and the WiFi network itself, change the SSID, encryption method, WPA password configured, enable other additional SSIDs for guest WiFi networks, possibility to configure MAC filtering, see the WPS configuration as well as go to the “Advanced” menu to make very interesting additional settings, such as enabling Auto 20/40 Coexistence for have the 40MHz channel width.


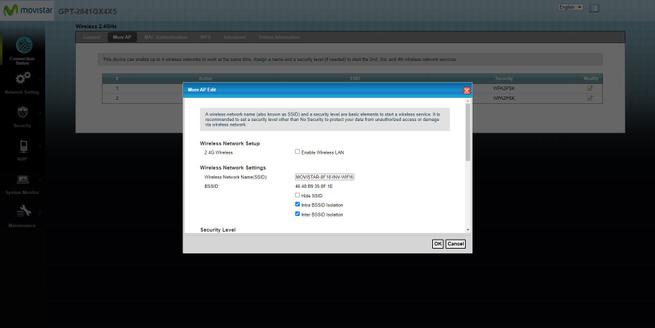

In the case of going to the ” Wireless 5GHz ” configuration menu we can see exactly the same configuration options as in the other frequency band. In this menu, the most interesting thing is in the “Advanced” menu where we can activate the 160MHz channel width, with the aim of achieving a higher wireless speed. We can also separate the frequency bands (and disable band-steering) by selecting the Unique SSID option in “disabled”.
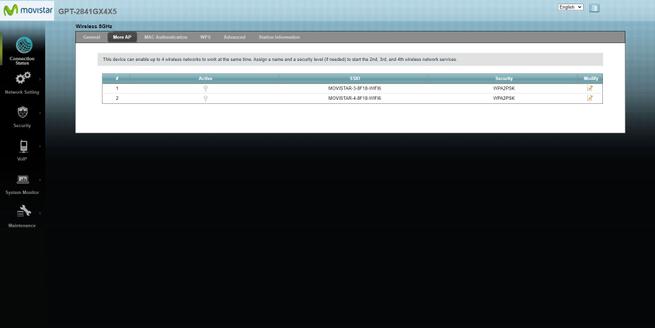


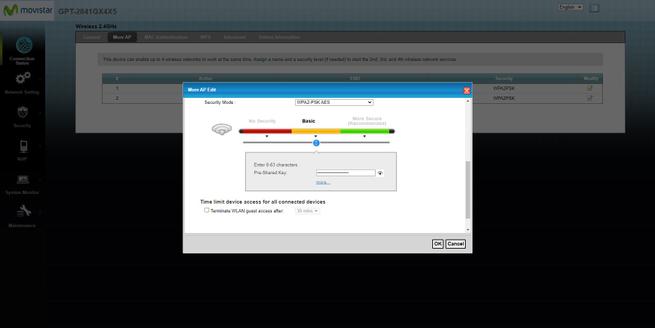
Of course, one of the main novelties of the firmware of this router is that now we have the possibility to configure the WPA3-SAE encryption, but you must be careful when enabling it because the band-steering and the WPS will stop working, in addition, it is mandatory that each and every one of your WiFi clients support this feature, otherwise you won’t be able to connect them to the wireless network.
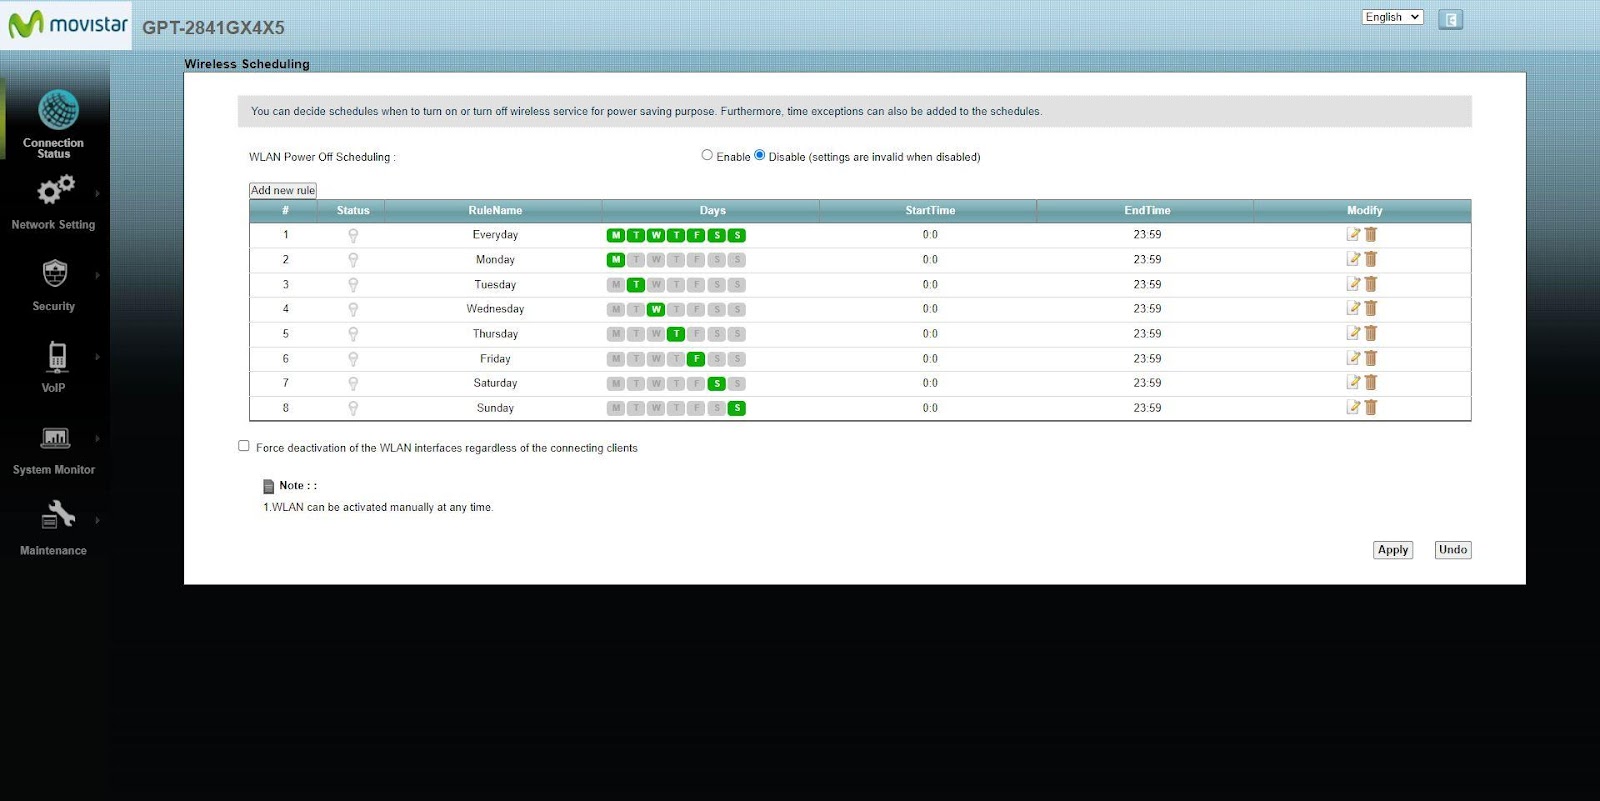
In the ” Wireless Scheduling ” menu is where you can configure different profiles to activate or deactivate the WiFi wireless network, perfect for turning off the wireless network when we are not using it.
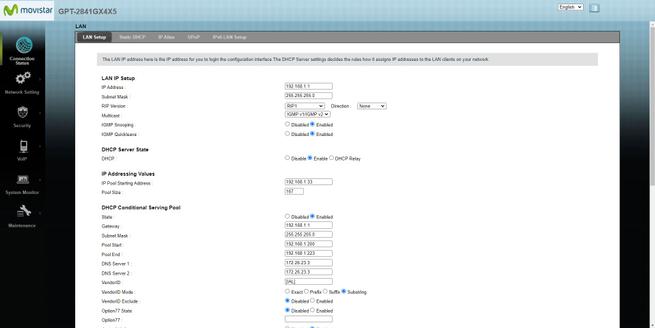
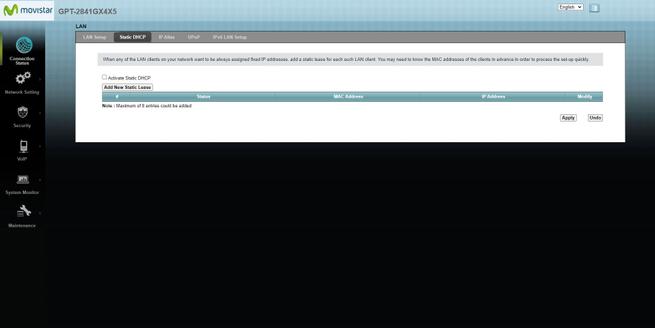
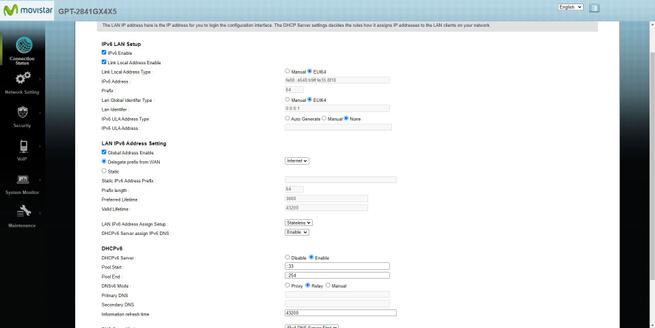
In the ” LAN ” menu is where we can configure in detail everything related to the local network subnet, we can change the IP address, mask, DHCP server configuration, DNS servers and other parameters of the IPTV connection that we have configured. From this LAN section we have the Static DHCP where we can activate it and add different devices so that they always obtain the same private IP address. Other options related to this is being able to configure the IP Alias, activate UPnP and also configure the part of the LAN network with the IPv6 protocol.


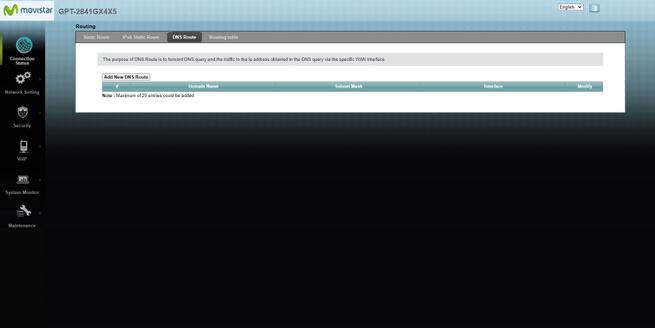
In the ” Routing ” section we can see how to create a static route in the router, both for IPv4 and IPv6 networks. We can also see the DNS route configuration as well as the complete routing table.


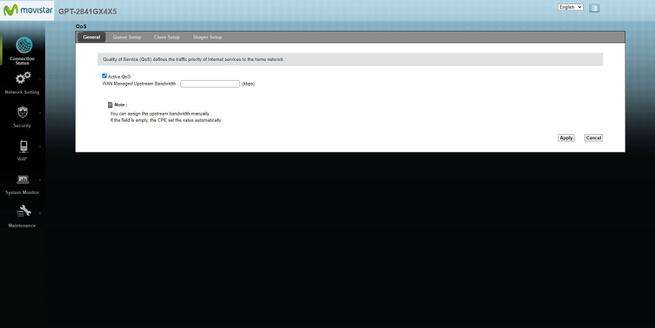
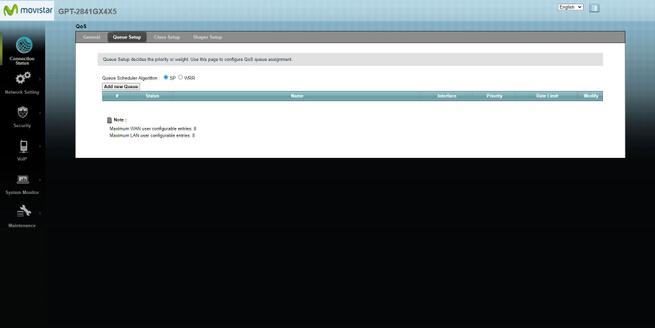
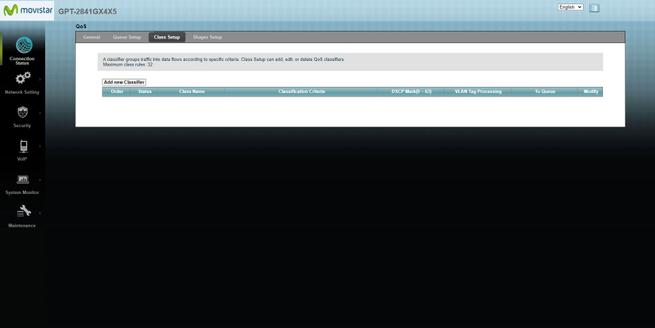
In the ” QoS ” section we can configure this technology to prioritize network traffic, we can configure the different queues in a very advanced way and also assign different priorities, in addition, we can enter the traffic classes menu and also the width limiter band for each client (Shaper Setup). Thanks to this menu, we will be able to optimize the local network so that the same computer does not monopolize all the available bandwidth, and that we can play with the lowest possible latency.

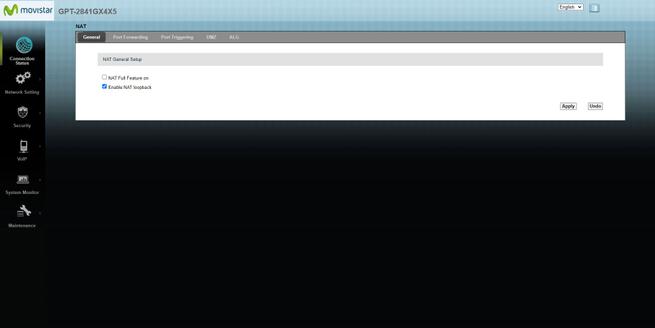
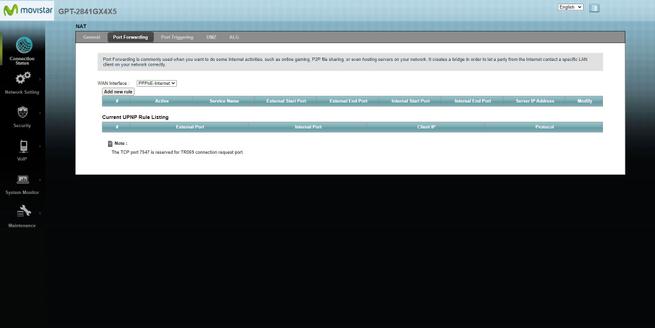
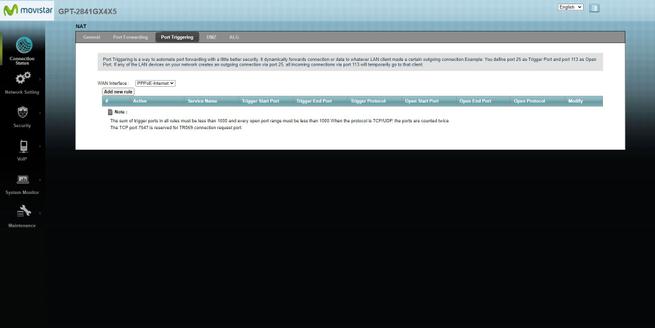
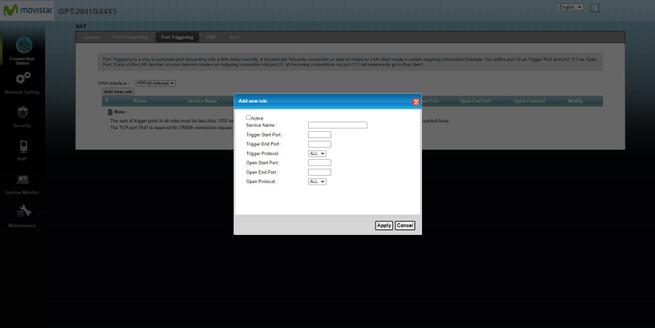
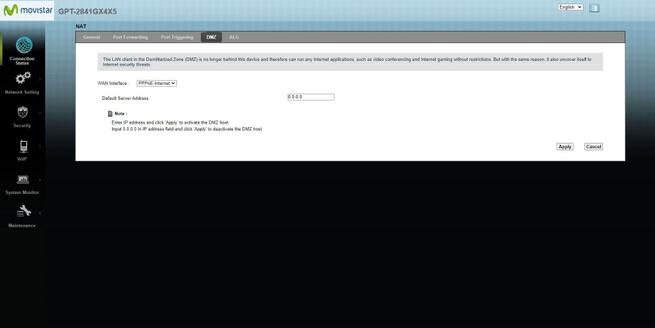
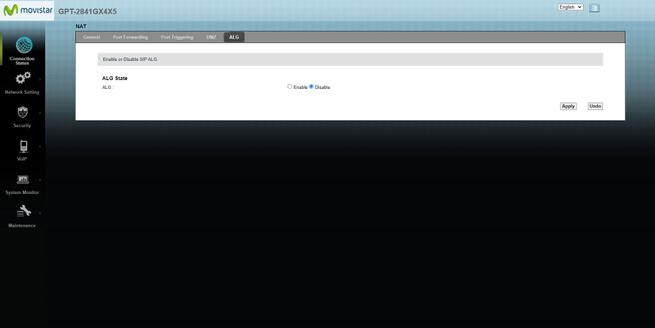
In the « NAT » menu is where we can configure Full Cone NAT, NAT Loopback, open ports with Port Forwarding, also configure Port Triggering, as well as open the DMZ to the device we want and enable ALG. All these configuration options are the usual ones in any router.

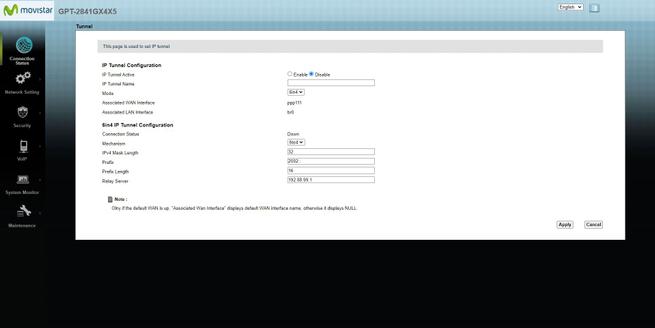
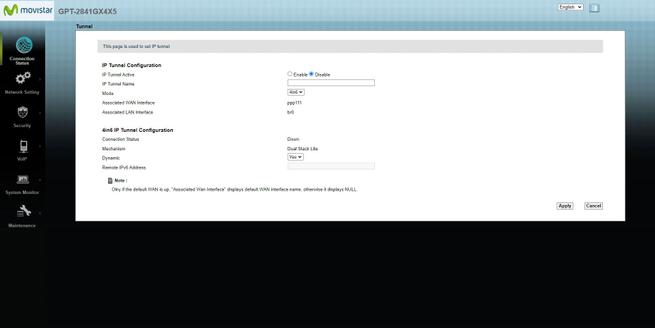
In the ” Tunnel ” menu is where we can configure different IPv4 and IPv6 tunnels, such as 6in4 or 4in6, as you can see below:


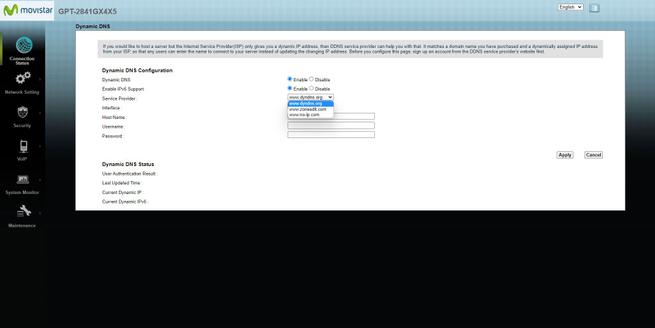
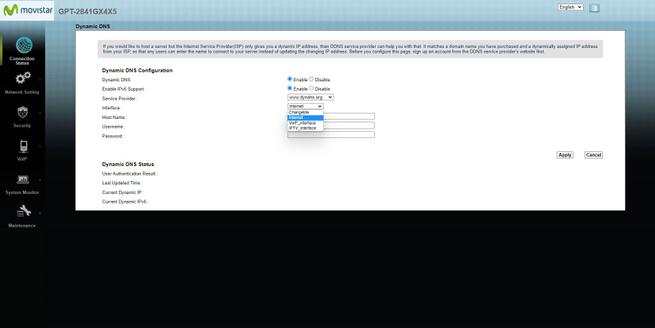
Finally, in the ” Dynamic DNS ” menu we have the possibility to configure this dynamic DNS service, with the aim of relating a host name to the public IP address. This router supports the services of DynDNS, No-IP and also Zoneedit.


Once we have seen all the menus in the “Network settings” section, we are going to go to the “Security” menu.
Safety
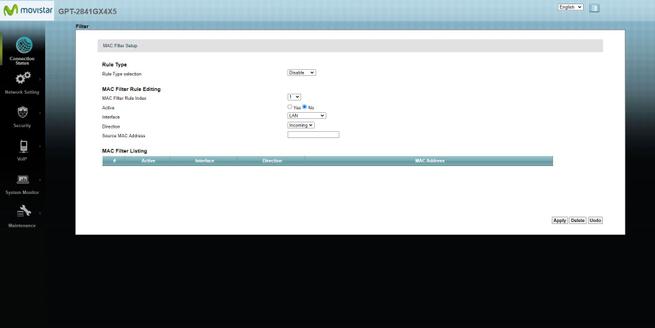
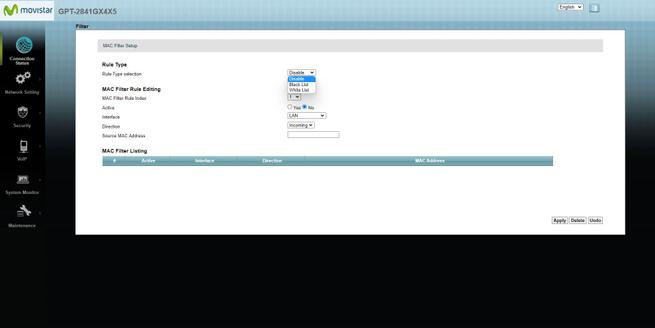
In this configuration menu we have the ” Filter ” menu where we can create a whitelist or blacklist policy to block computers through the MAC address. We can define which interface we want to block for that specific MAC address. If you need to control which devices can and cannot be connected, then this is the menu to use.


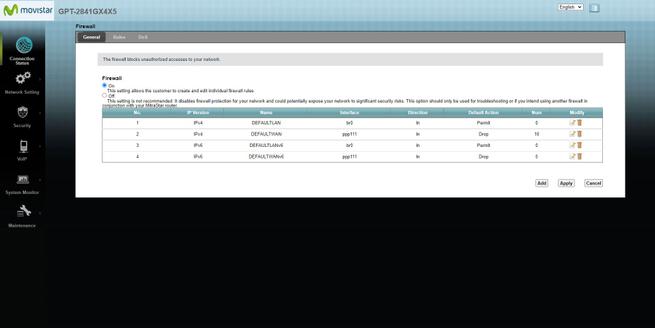
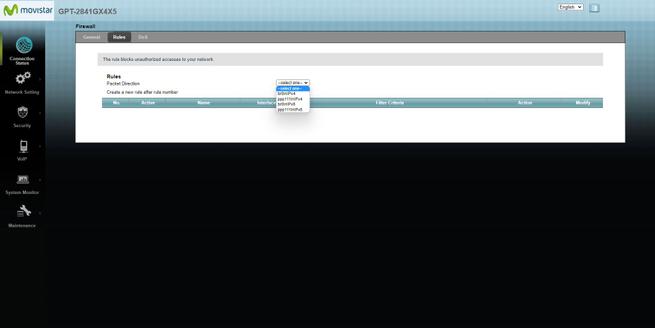
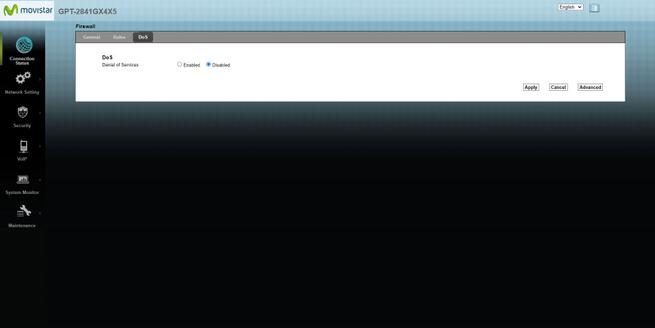
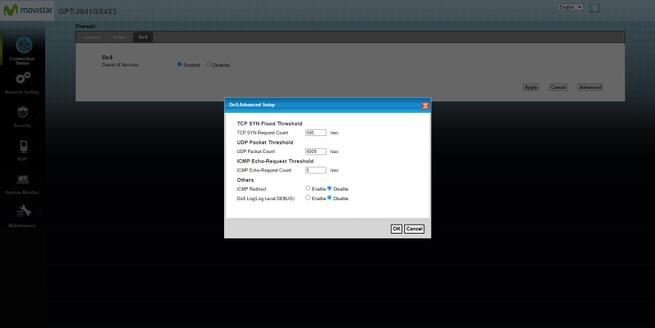
In the « Firewall » menu we can enable it (by default) or disable it (it is not recommended for security), we can create different rules to allow or deny the network traffic that we want, on any physical interface and in any direction (incoming or outgoing). We have the ability to create quite advanced rules, although you could inadvertently block legitimate traffic, and even block yourself, so you need to set this up very carefully. Another important aspect is that we can activate the system to avoid DoS and configure the different attacks as we want.

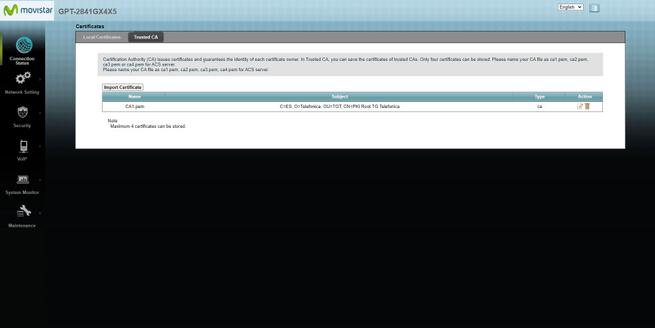
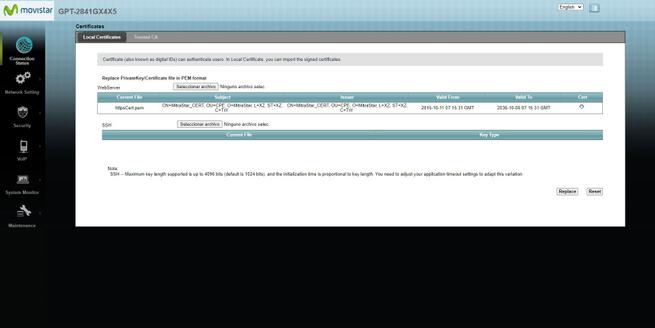
In the ” Certificates ” menu we can see the digital certificates that we have inside the router, such as the HTTPS certificate and also the CA that Movistar has introduced in this equipment. Of course, we can set up an SSH key to authenticate locally or remotely in this way.


Now that you have seen all the “Security” options, we are going to go to the VoIP menu where we will have all the available configuration options for Movistar voice over IP.
VoIP
This “VoIP” menu is where we have all the advanced configuration options of the router’s SIP. In principle, we should not touch anything in this configuration, because the slightest change could cause VoIP to not work correctly, so you must take it into account. In all these menus is where we can configure the different protocols, the SIP server domain, registrar and more parameters necessary for everything to work correctly.

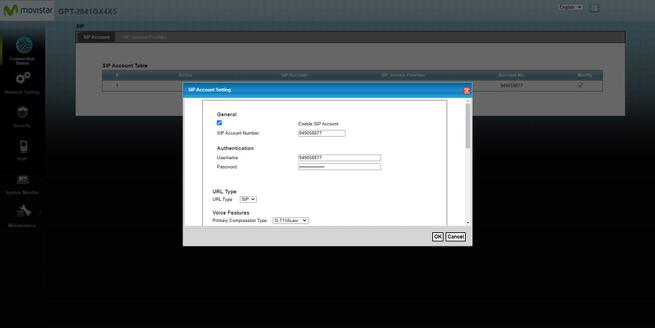

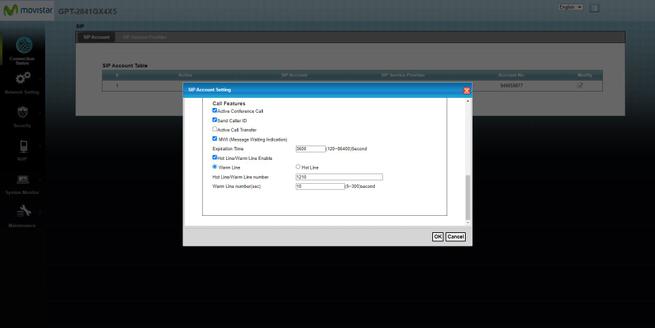

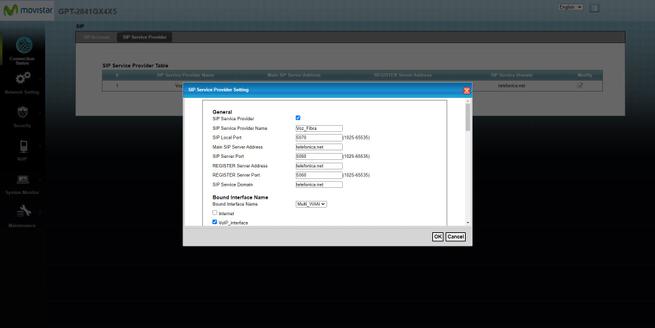
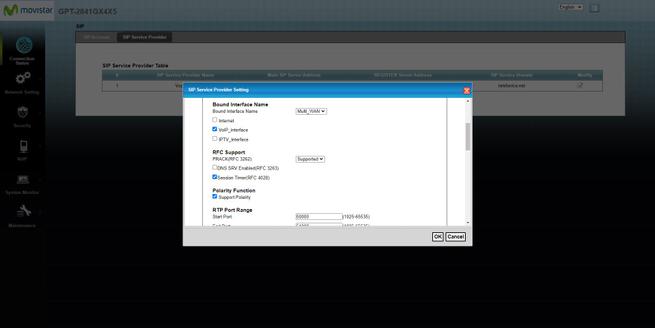
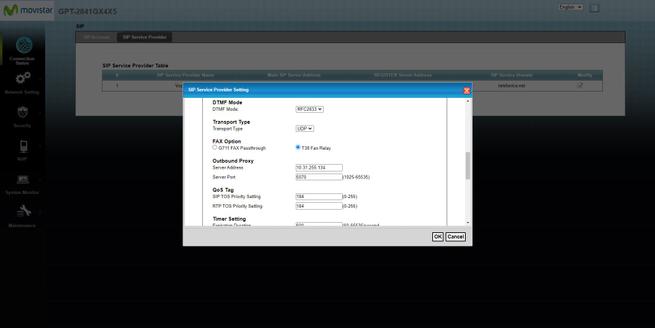


As you can see, in these VoIP menus we have everything necessary to see the current VoIP configuration of the router.
System Monitor
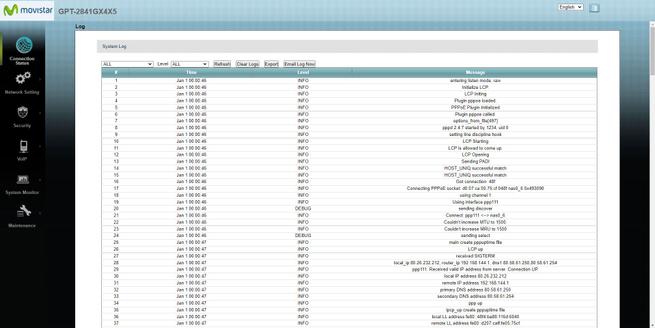
In the ” Log ” menu we can see the complete log or registry of the router, in this menu we can see if there is any type of error or failure in the equipment, in order to detect different incidents and be able to know what is happening. Thanks to the complete registry, we can filter by different types of notices, and even by the level of severity, perfect for locating everything we need as soon as possible.


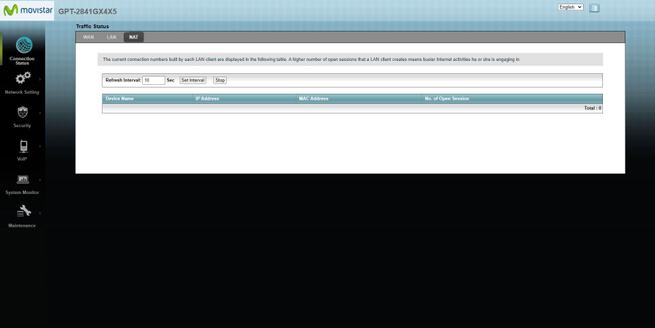
In the ” Traffic Status ” section is where we can see the network traffic status of the Internet WAN, and also all the details about the LAN and even NAT. If you want to see all the traffic statistics, this is the menu to look at.


We also have a specific SIP status menu for VoIP telephony, here you can see if it is working well or if there is some kind of problem or incident.

Now that we have seen all the “System Monitor” menus, we are going to fully enter the “Maintenance” menu.
Maintenance
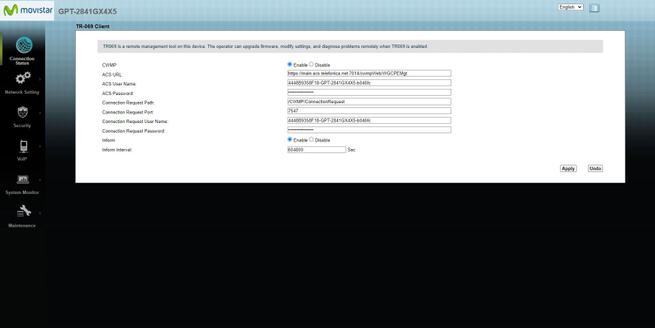
In this menu we can change the administration password from “User Account”, it is exactly the same menu that we have in the basic one, but we can also do it from this advanced menu without problems. Other options that we have here is the configuration of the TR-069 client to communicate with Movistar and download the new firmware and configurations made by the operator, so that it is reflected to all clients easily and quickly.
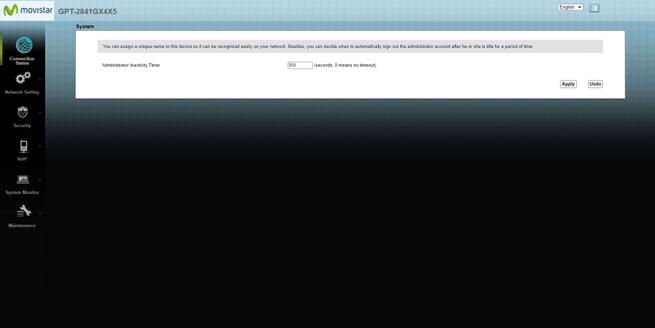
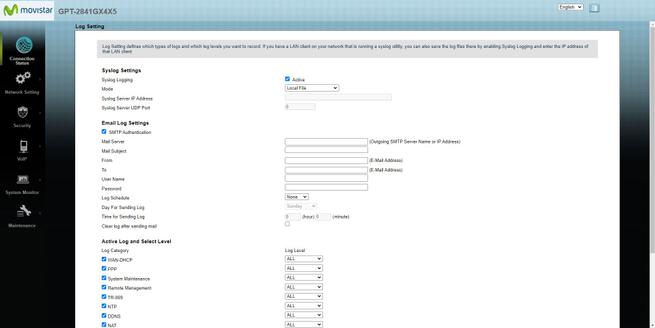
We also have a specific menu to configure the automatic logout due to inactivity, by default it is set at 5 minutes. Other options are that in this section we have the possibility of configuring the records or logs, in fact, we could configure the router to send us the logs by email, and what it should record.

In the event that you have a new Movistar firmware on your PC, and you want to update the router manually, you will be able to do it from the advanced menu (we can also do it from the basic menu). Other options are to save the router configuration, restore said configuration, as well as reset the equipment to factory settings. Of course, we have a specific section to configure the restart of the router.

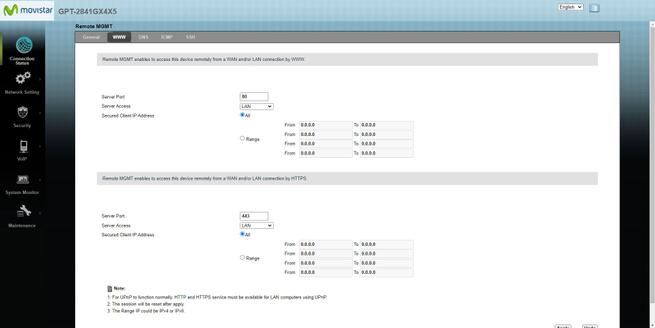
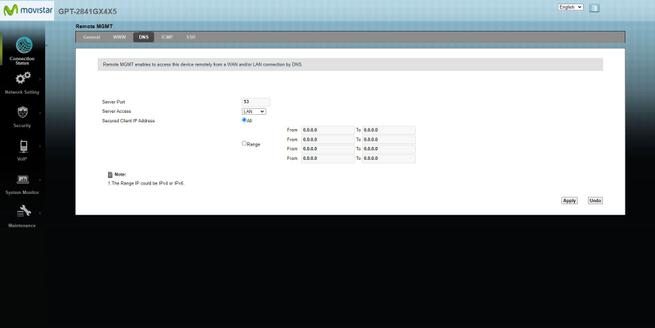
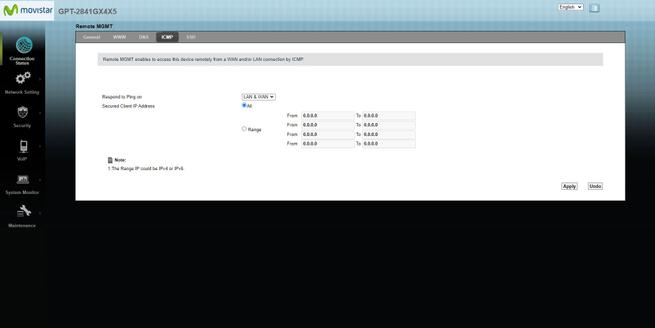
Other options available in this router is to activate the management of the router remotely, to enter the configuration menu through the Internet. We can configure both the web server with HTTP and also with HTTPS, and define the access (LAN, WAN, LAN and WAN). Depending on how we want to access our router, we will have to configure it in one way or another. We can also configure where we want the DNS server to listen, which basically should always be on the local network. In case you want to send a ping from the Internet, you can also configure the ICMP behavior. Finally, we have the possibility to configure the SSH server.


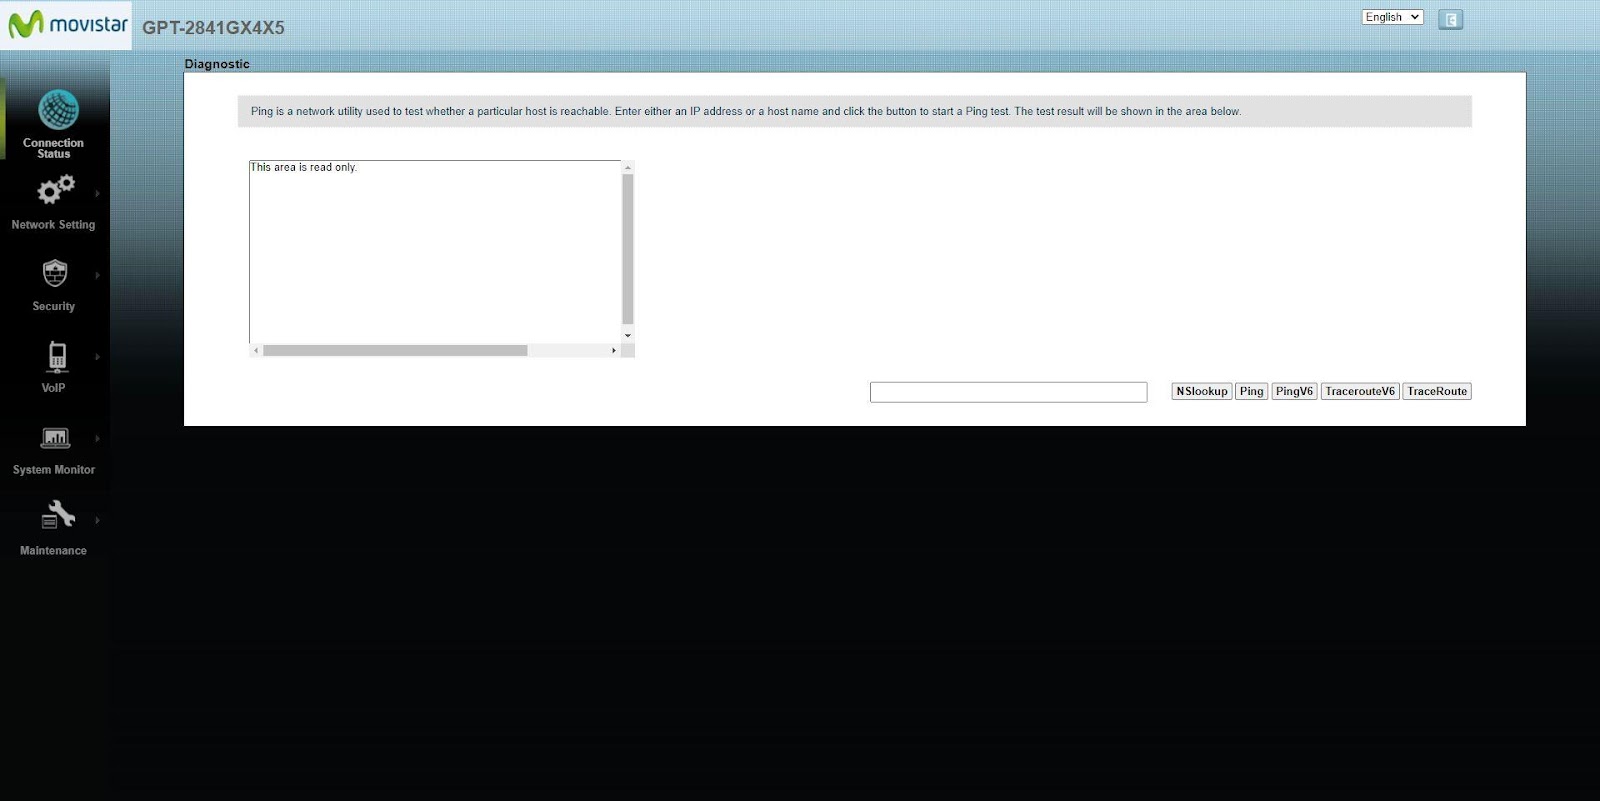
In the “Diagnostic” menu we can perform a ping (both with IPv4 and IPv6 networks), a traceroute (both with IPv4 and IPv6 networks) and an nslookup.
Finally, in the GPON Password menu we can see the IDONT key that we have entered in the router to authenticate correctly with the OLT.

If you want to see all the firmware options in a complete video, here are all the details.
So far we have come with the analysis of the advanced firmware of this Movistar Router Smart WiFi 6 router, and also with the complete analysis of the equipment. Now we are going to see the final conclusions, and we will also indicate the strong and weak points.
Last conclusions
This new Movistar Router Smart WiFi 6 router is the best option for a Movistar customer who has the old HGU. At the wired level we are going to get exactly the same speed, however, Wi-Fi improves enormously compared to its predecessor, and that is that the new Wi-Fi 6 standard will allow us greater coverage and also greater real speed, especially if the clients WiFi supports this new standard and has a 160MHz channel width, to get even more out of its speed.
The LAN-LAN performance that we have achieved with this router has been excellent in all performance tests, achieving more than 900 real Mbps in all of them, including the test of 1,000 TCP threads where we should obtain slightly less speed, so it is great news since we can use a NAS server or transfer files between computers on the local network without limit. Regarding the LAN-WAN performance , on this occasion we have not been able to carry out the test since the Internet WAN is the GPON port, however, we have tested with P2P programs to stress the router as much as possible, and the result has been that we can obtain the maximum bandwidth without problems when we are downloading files intensively.
Regarding the WiFi coverage and speed of this new router, it has been excellent in every way, and this model is one of the best WiFi 6 routers we have tested to date, and that is the router of an operator that normally does not usually provide a good speed. This model provides homogeneous coverage in both the 2.4GHz and 5GHz bands, logically in the 2.4GHz band we will achieve a clearly lower speed than in the 5GHz band, but the results have been as expected. In the 5GHz band, this router has behaved perfectly if we configure the 160MHz channel width, and with this feature activated we can have speeds of 930 Mbps in download and more than 820 Mbps in upload without many problems. The truth is that both the coverage and the speed of this team is something to take into account.
This router incorporates the typical Movistar firmware with a basic menu and an advanced menu, with the usual configuration options in terms of WiFi network, local network and more. The highlight of this new model is the band-steering, which we can easily deactivate through the advanced menu. We also have the possibility of configuring the 160MHz channel width, since it is not configured by default, in addition, we can also configure the security with WPA3-SAE for the two WiFi frequency bands. In the advanced menu we can put the different devices in the Static DHCP, open ports, open the DMZ and many other advanced settings.
However, not everything is perfect in this new Movistar Router Smart WiFi 6 router , we miss that we do not even have a 2.5G Multigigabit port, something that today is very common to use it for the LAN and connect a PC with a compatible network card. We also don’t have a USB port to use it to share files on the local network and the Internet, something that most routers do have today. Currently the firmware does not allow you to configure a full bridge mode to place a neutral router behind, however, if you are in this scenario, the best thing you can do is buy a Huawei ONT to avoid problems. Finally, we miss that this equipment does not incorporate functions as a VPN server, to connect remotely to the local home network.
If we compare the firmware of this router with other manufacturers such as ASUS or AVM, the differences are clearly against the Movistar router, because both ASUS and AVM have a large number of services, including the possibility of configuring VPN servers and much more.
The price of this router is €50 in its self-installable version, and €100 if we need a technician to come home to install it. The price is quite competitive if we already have a Movistar HGU, because the improvement in the WiFi network is very, very great. Logically, if you use the HGU in single-user mode to put your own router, or if most of your equipment is connected by cable, it is not worth buying this new model, because the most important improvement is that it incorporates Wi-Fi 6 and all that this entails.
Strengths
- Excellent LAN-LAN performance in all tests, we have achieved great wired performance even with 1000 TCP threads. You will not have problems in the local network when you transfer hundreds of files.
- Excellent LAN-WAN performance, we have used qBittorrent to download up to 10 torrents simultaneously, and check if we reach the maximum of the contracted optical fiber (symmetrical 1Gbps).
- Outstanding Wi-Fi performance in the 2.4GHz band, we have obtained a speed of more than 200 real Mbps. Vertical and horizontal coverage is also very good.
- Wi-Fi performance in the 5GHz band is excellent. In places close to the router we have achieved more than 900 Mbps download speed and more than 800 Mbps upload speed. This model will be able to take advantage of symmetrical 1Gbps via WiFi if you’re in the same room, and achieve speeds of more than 500 Mbps in real life almost anywhere in the house, although this obviously depends on many factors.
- The basic and advanced configuration firmware have the same options as always at Movistar.
- Physical WPS button for each frequency band, to easily add devices.
- WiFi on/off button for each frequency band.
- Excellent price: the price of this router is €50 if you install it yourself, and €100 if you need a technician to install it. You should know that it is mandatory to return it if you unsubscribe from Movistar, under a penalty of €97.28.
Weak points
- If you want to configure it in single-user mode for Internet only, it works, but in full bridge mode to pass all the VLANs as tagged it doesn’t work (or we haven’t known how to do it, because the router with triple vlan doesn’t receive anything).
- If you activate the 160MHz channel width, it will only be in the download direction and not in the upload direction (judging by the synchronization and real speeds), in addition, it does not allow the use of UNII2-Extended channels either.
- We do not have USB ports, nor does the firmware incorporate such interesting services as a VPN server or many others that manufacturers do usually have.
Our assessment of this Wi-Fi 6 Movistar Router Smart WiFi 6 router after thoroughly testing its performance, checking all its firmware options, and the price of only €50, is 9/10 .
We hope you liked the analysis, if you have any questions you can leave us a comment and we will be happy to answer you.


